Configure HM Dashboard Settings
The Hiring Manager (HM) Dashboard is a HiredScore interface for hiring managers to screen and action candidates.
Administrators can use the
HiredScore Tenant Setup
task to customize up to 5 hiring manager phases and assign specific Job Application business process steps to each phase. They can also select the available hiring manager actions for each phase (such as Move Forward
or Do Not Advance
).You can configure the default settings by deactivating specific phases, or assigning actions as required. You can also configure the candidate profile for each phase based on workflow and business requirements.
Legacy HiredScore users must be aware of the following when using the
HM Dashboard Settings
sub-tab:
- The HM Dashboard settings on this sub-tab adhere to a specific framework. You might receive an error when you access theHM Dashboard Settingssub-tab if your current HiredScore setup is configured in a way that doesn’t follow this framework. If this occurs and you need to change HM phase labels, assign new steps to a phase, and/or configure actions, contact Workday Support to apply the changes.
- TheJob Applicationbusiness process steps that are available for each phase configuration populate from the current configuration in HiredScore. You might receive an error if the business process synchronization between Workday and HiredScore partially failed. If this occurs, you can either remove the step from the configuration, or attempt synchronization again (see Export and Sync the Job Application Business Process).
- On theHMTA Collaboratortab of theHiredScore Tenant Setuptask, click theHM Dashboard Settingssub-tab.
- ClickEdit.
- For each hiring manager phase:
- SelectEnabledor leave the check box blank to deactivate the stage.
- Enter a customizedPhase Label/Title, or use the default label.
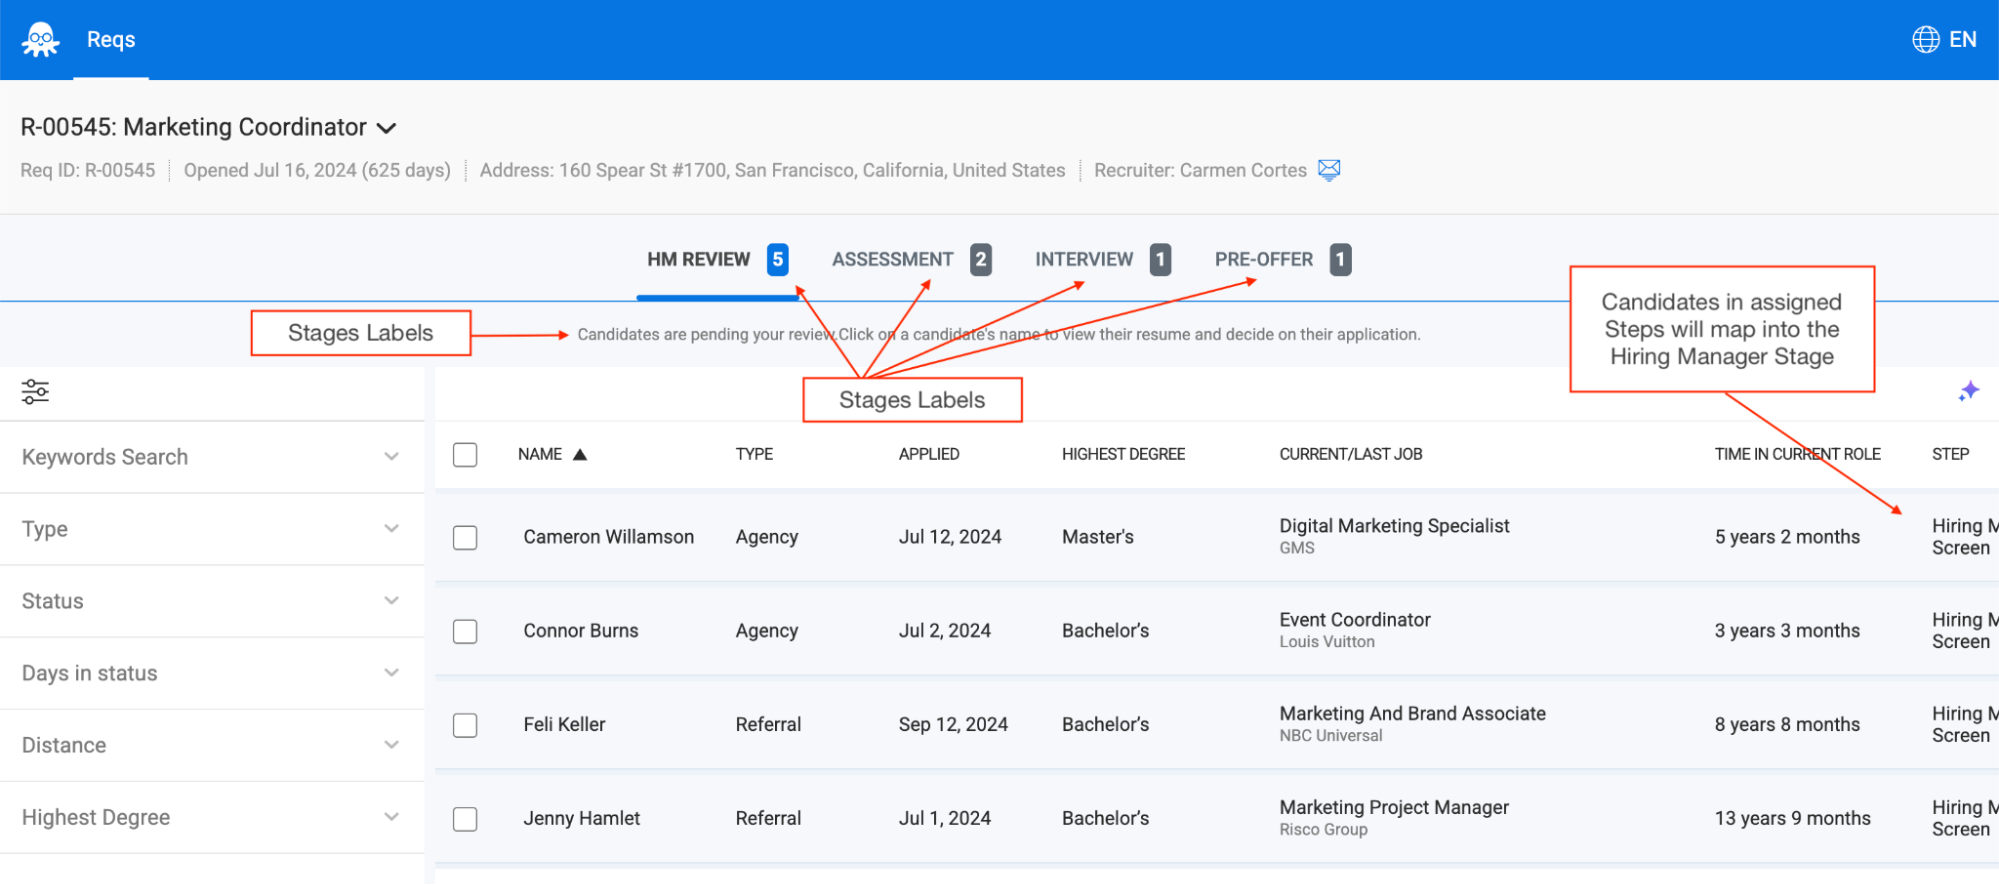
- Map aJob Applicationbusiness process step(s) to the hiring manager phase.Steps that you select on this prompt are mapped to the hiring manager phase. Candidates in these steps are visible to managers on the HM Dashboard for the corresponding phase (see theResultsection in this topic).You can search for steps more efficiently using keywords such as candidate, withdrawn, or assess (instead of step b, for example).
- Enter description text for the phase (see theResultsection in this topic to view where this text appears on the HM Dashboard).
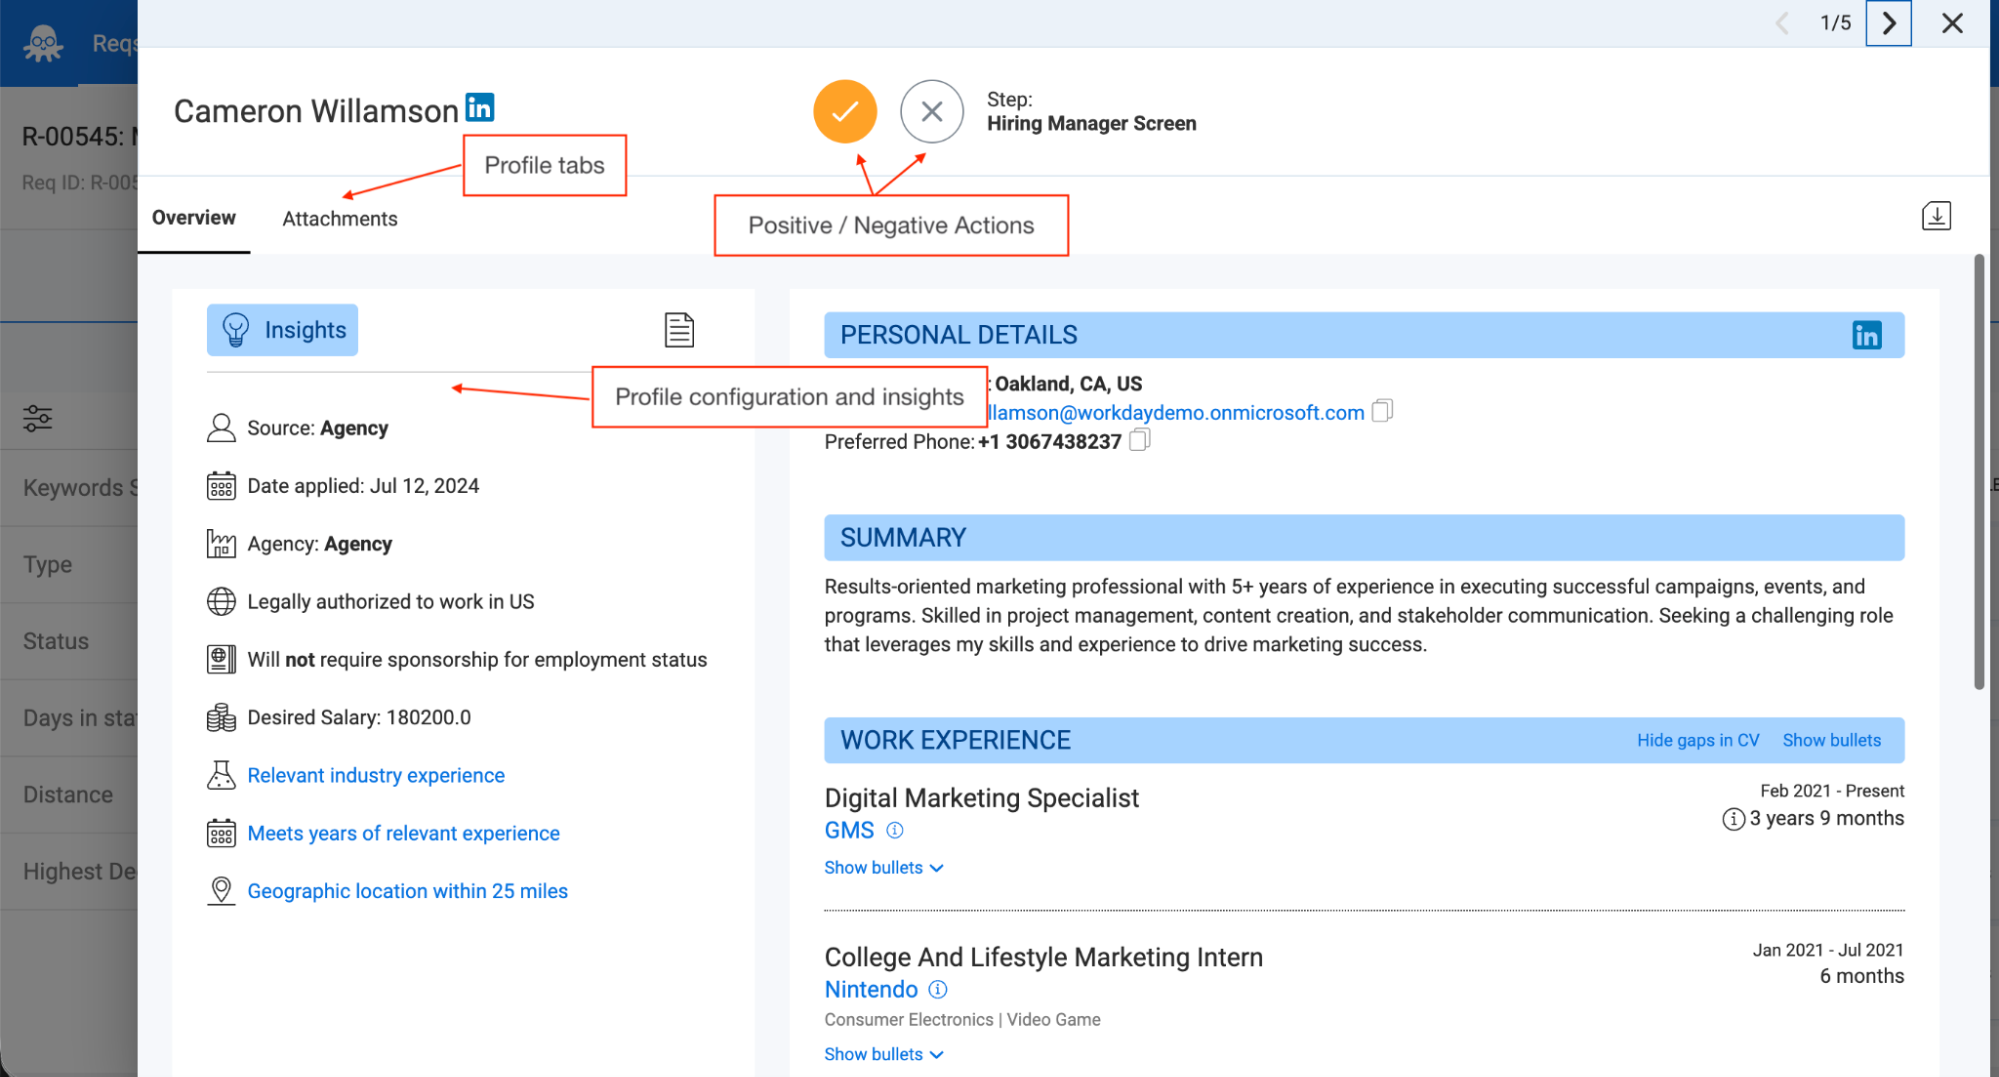
- Assign tooltip labels for the positive and negative action buttons.
- Assign steps from theJob Applicationbusiness process for the positive and negative actions
- Select theProfile Tabsyou want to enable for the phase.Example: You can enableDigital Interviewfor only specific phases.
- Select aProfile View Type.
- If you selectSmart Profileas theProfile View Type, you can configureProfile Insights.
- ClickOKandDone.
- (Optional) To test your configuration, login as a hiring manager (using SSO) that has a job requisition with candidates in different recruiting stages. Verify that the job requisition is visible on the HM Dashboard and that candidates display in the correct stages.
When you map
Job Application
business process steps to hiring manager phases (see step 3a
), the candidates at these phases become visible to the hiring manager on the HM Dashboard as illustrated below. The Description
text (see step 3d
) displays below the phase tab labels.