
Data Modeling
Overview
In this chapter, you will update the data model for your app. You will create a new business object, add a multi-instance field to connect it to an existing business object, and use bulk operations to create multiple business object instances in a single request.
Objectives
By the end of this chapter, you will be able to:
- Add a multi-instance field to a business object.
- Add a grid widget to an edit page.
- Use bulk operations to create multiple instances of a business object in one API call.
- Use a loop widget to display content in a grid.
Single-Instance Fields
Business object fields can have a type of
SINGLE_INSTANCE
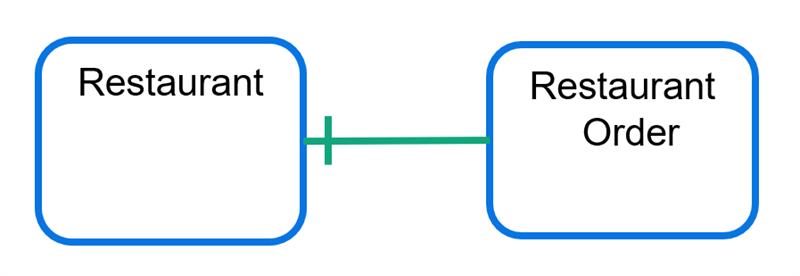
. A single-instance field creates a connection between two business objects. For example, an Expense business object could have a single-instance field connecting the Worker business object for the person submitting the expense.Single-instance fields are one-to-one connections. In the example from earlier, an Expense business object should only have one Worker business object who is submitting the expense. To create a one-to-many connection, use a multi-instance field instead.
Single-instance fields can connect to Workday-delivered business objects (like Worker or Supervisory Organization), or they can connect to business objects that you define in your Extend app.
Multi-Instance Fields
Business object fields can have a type of
MULTI_INSTANCE
. A multi-instance field creates a one-to-many connection between business objects. For example, a Team business object could be associated with multiple Worker business objects.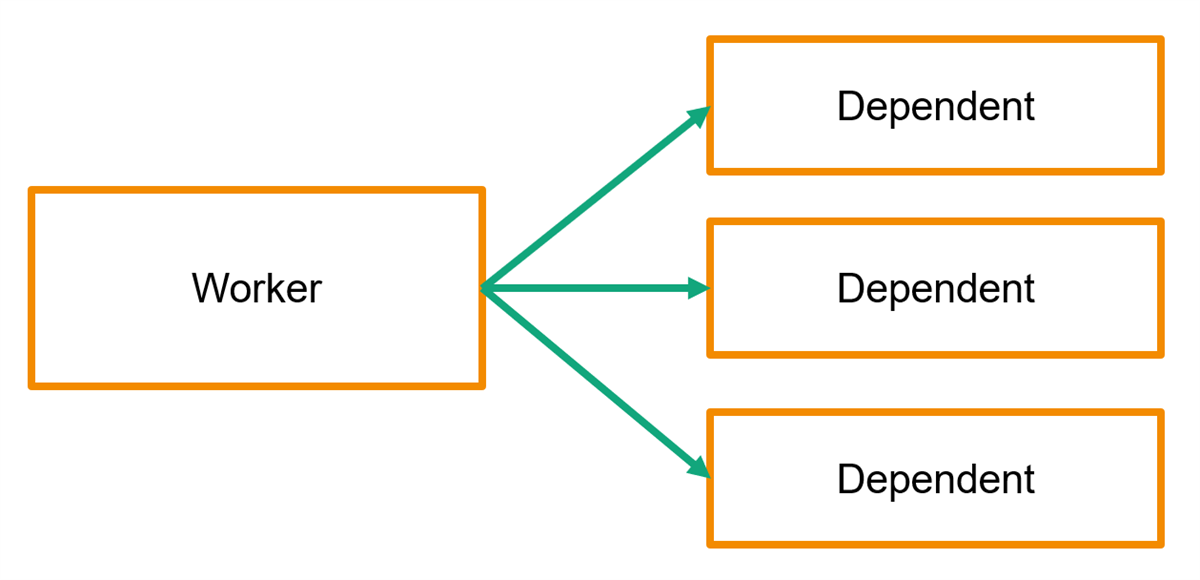
Note
: Workday recommends that you keep the count of instances per MULTI_INSTANCE
field below 1,000. Larger numbers of instances per MULTI_INSTANCE
field might affect performance.Updating the Meal Order Data Model
Currently, when a user places a new restaurant order, they have to enter all the menu items they want to order in a single text box. To improve this user experience, you decide you want users to be able to enter each menu item separately, using a grid widget.
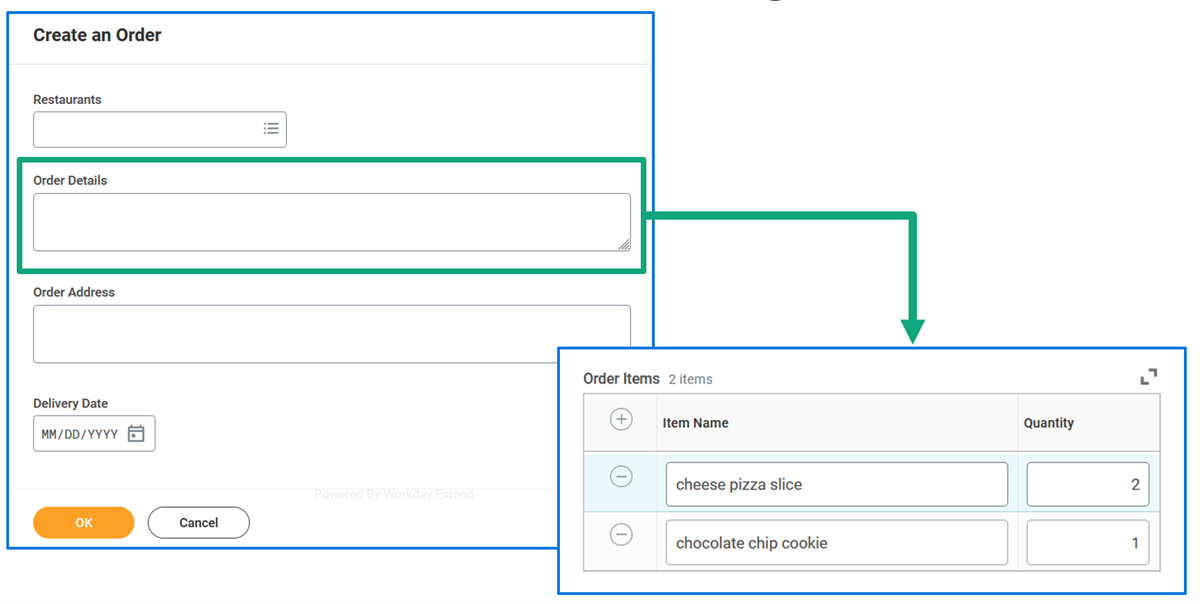
In order to make this change, you will need to update the data model for the Meal Order app to keep track of these separate order items.
- You decide to create a new model business object called OrderItem, which will store the order item's name and quantity entered by the user.
- You will also need a new multi-instance field on the Restaurant Order business object, to keep track of the Order Item instances associated with that order.
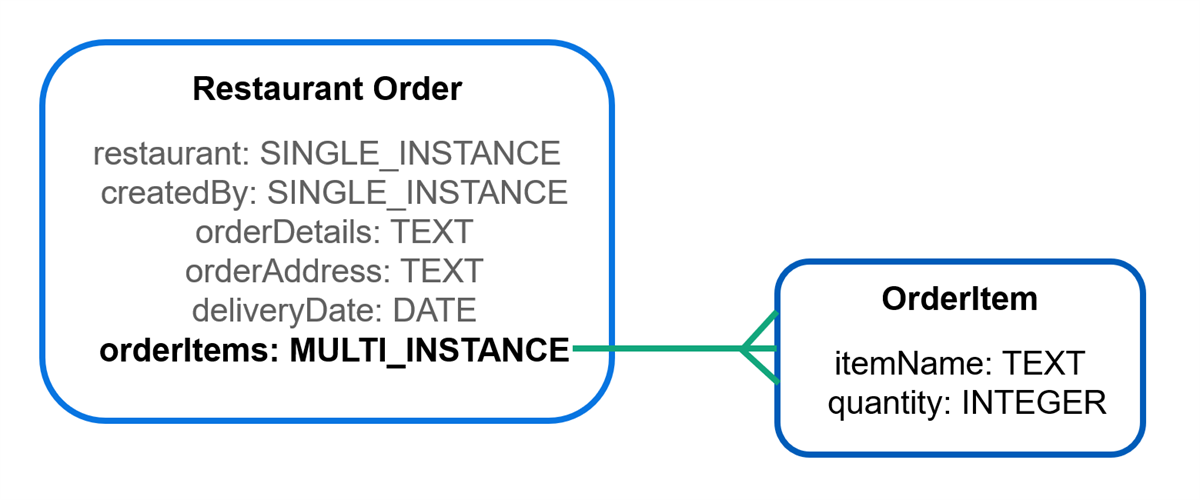
In this chapter, you will go through the following process to update the Meal Order data model:
- Create a new OrderItem business object.
- Add a MULTI-INSTANCE field to the Restaurant Order business object called orderItems.
- Update the UI and data flow when creating new Restaurant Orders to include creating Order Items and associating them with the new Restaurant Order.
Transforming Grid Data
The
grid
widget includes a getRows()
method, which you can use to access the data within the grid. getRows()
returns a list of grid row objects. For example:[ { "selected": false, "childrenMap": { "ratingCol": { "value": 5, ... }, "bookTitleCol": { "value": "Alice in Wonderland", ... } }, "children": [ { "value": 5, ... }, { "value": "Alice in Wonderland", ... } ], "visible": true }, ... ]
In the grid rows example above, notice that there are two options for how you can retrieve the value from a particular column within a particular row:
- children: A list of objects for each column in the row.
- childrenMap: A map of objects for each column in the row. To identify each cell on the grid row, the map uses thecolumnIdattribute of the gridcolumn.
If you use
childrenMap
, you can access column values by their column ID. If you use children
, you need to know what index a column is at, which is likely a more brittle solution.Bulk Operations
The POST, PUT, and DELETE methods support bulk operations. Append the
?bulk=true
parameter to the HTTP request to create, update, or delete up to 100 instances in a single request.The request body for a bulk operation has the following shape. The shape of each element in the data array depends on the business object you are accessing.
{
  "data": [
    {
       // Fields for the first business object instance
    },
    {
      // Fields for the second business object instance
    },
    {
      // Fields for the third business object instance
    },
    ...
  ]
}
For example, consider a Workday Extend app where users can make charitable donations.
Term | Definition |
|---|---|
Bulk POST Request URL | POST https://api.workday.com/apps/charitableDonations_abcdef/v1/charities?bulk=true |
Bulk POST Request Body |
|
Endpoint Chaining
You primarily use expressions to associate data to
value
bindings, but you can use them in many places. For example, you can write an expression to set the url
binding on an endPoint
.A PMD can contain more than one
endPoint
. Multiple endPoints
execute sequentially. This code is another example that shows why the order of your code in the PMD matters. Here, the paySlipsForWorker
endpoint depends on data that the currentUser
endpoint brings back:"endPoints": [ { "name": "currentUser", "authType": "sso", "url": "https://api.workday.com/common/v1/workers/me" }, { "name": "paySlipsForWorker", "authType": "sso", "url": "<% `https://api.workday.com/common/v1/workers/{{currentUser.id}}/paySlips` %>" } ]
Loop Tag
The loop tag is a utility tag for iterating through a list. The loop tag doesn't correspond to a widget itself, but it can be used to produce dynamic widgets based on a list of inputs.
For example, the following loop tag iterates over each of the worker objects returned by the workers endpoint and creates a text widget to display the worker's name and email:
{
  "type": "fieldSet",
  "title": "Update the email address",
  "children": [
    {
      "type" : "loop",
      "label": "Loop",
      "on" : "<% workers.data %>",
      "as" : "objectToLoopOn",
      "children" : [
        {
          "type" : "text",
          "label": "<% objectToLoopOn.descriptor %>",
          "value" : "<% objectToLoopOn.person.email %>"
        }
      ]
    }
  ]
}
You can use the loop tag on view and edit pages.
Loop Tag Attributes
Attribute | Data Type | Description |
|---|---|---|
as | string | Required. The variable name to use to reference the current iteration in the list provided by the on attribute. |
children
| list | Required. An array of widgets that the page dynamically generates.
This attribute contains the template for the loop iterations. Bindings in the children can reference the as and index attributes. |
index
| string | A variable name that evaluates to the index of the current iteration.
Example: If you set index to i, you can use i to reference the iteration index in the children attributes (e.g., 0, 1, 2). |
limit | integer | A number that limits the number of iterations.
Example: If limit is 4 and the on attribute contains 6 items, then the loop only iterates 4 times. If you don't specify limit or if you set it to -1, the loop iterates through all the data listed in the on attribute. |
on | dynamicBinding-list | The list of values to iterate. The children tags will render again if the values of the list change. |
sortOrder
| binding-string | When you set sorted to true on the section or fieldSet parent of this widget, the sortOrder attribute determines the order of this widget within its parent. The sort order is relative to the siblings of the widget.
Typical values are "a", "b", "c", and so on. Example: The widget with "sortOrder": "a" displays before the widget with "sortOrder": "b".
Note : The sortOrder doesn't apply to sorting data on the widget. sortOrder only applies to the placement order of the widgets within the parent widget. |