Working with Multiple DataSets
Overview
Report designer uses secondary datasets to handle data from multi-instance objects.
Objectives
By the end of this chapter, you will be able to:
- Create secondary datasets.
- Bind multiple datasets.
- Embed tables in the report design.
- Use the data report item to add custom values.
Working with Multiple Data Sets
When the related Workday custom report includes both primary and secondary business objects, which also include multi-instance fields, you will create a data set for each business object and multi-instance field in the report.
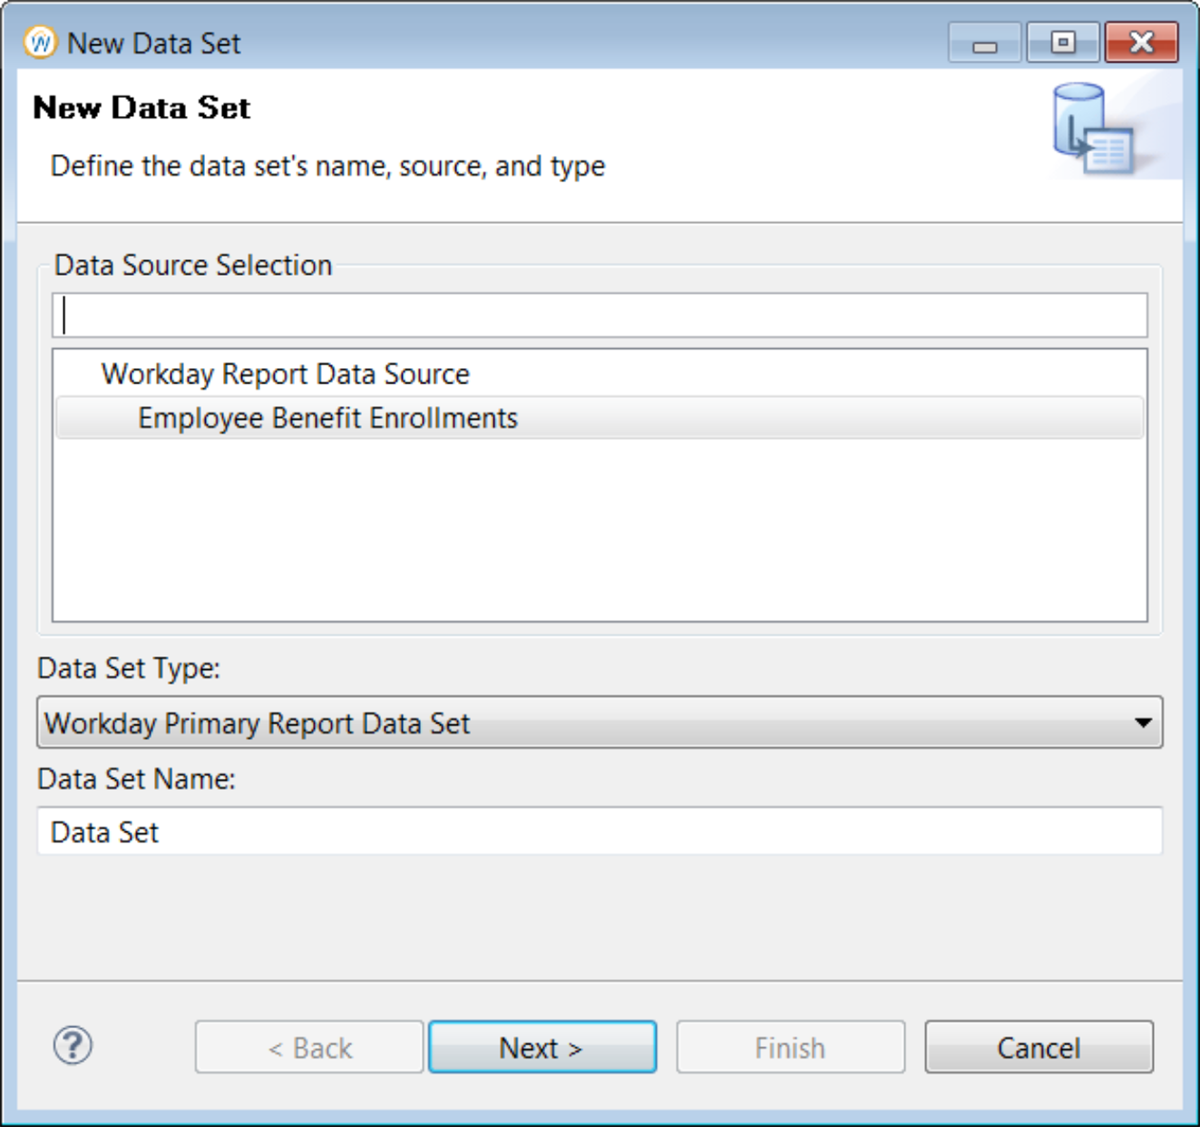
In the Data Explorer view, right-click the Data Sets folder, then select New Data Set. The New Data Set wizard opens. The Data Set Type list displays the data set type, which in this case is the Workday Primary Report Data Set. This data set type accesses the primary business object in Workday.
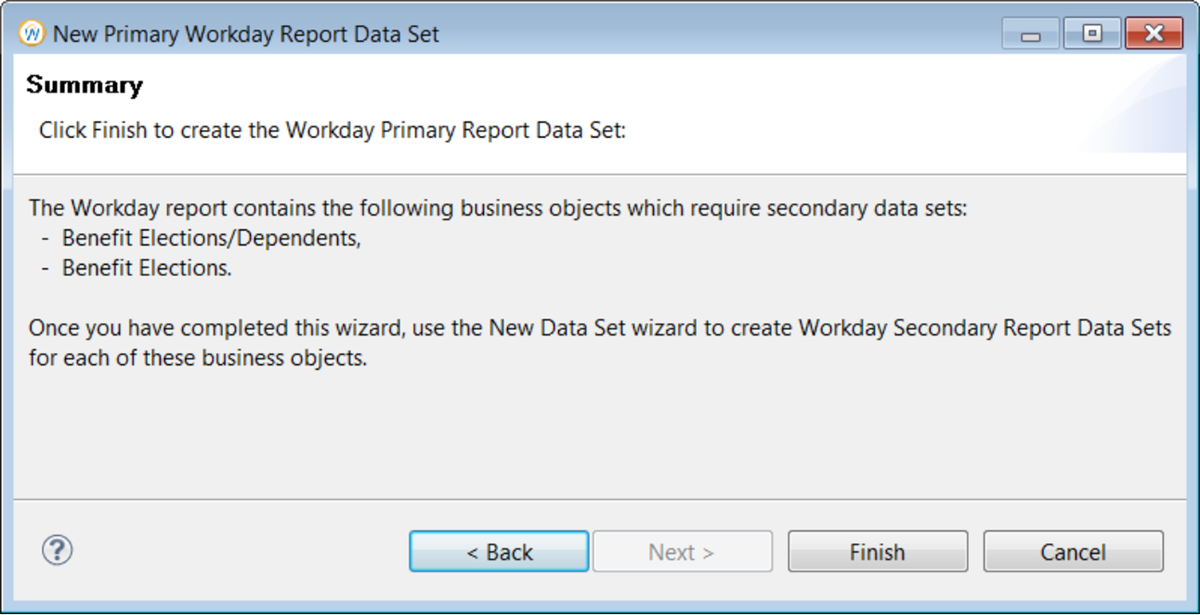
The Edit Data Set dialog box opens on the Output Columns page, which displays the XML schema element values for each of the columns that you added as rows to your custom report, for the Primary business object in Workday, and their display names.
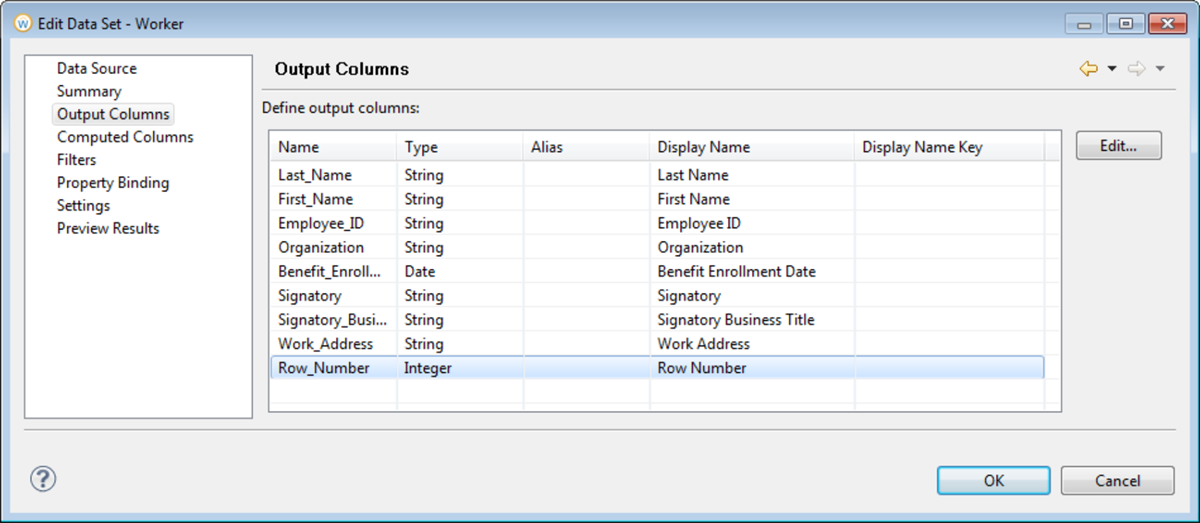
In addition to defining output columns for each of the rows in the custom report, the Report Designer adds a Row_Number column automatically to support grouping.
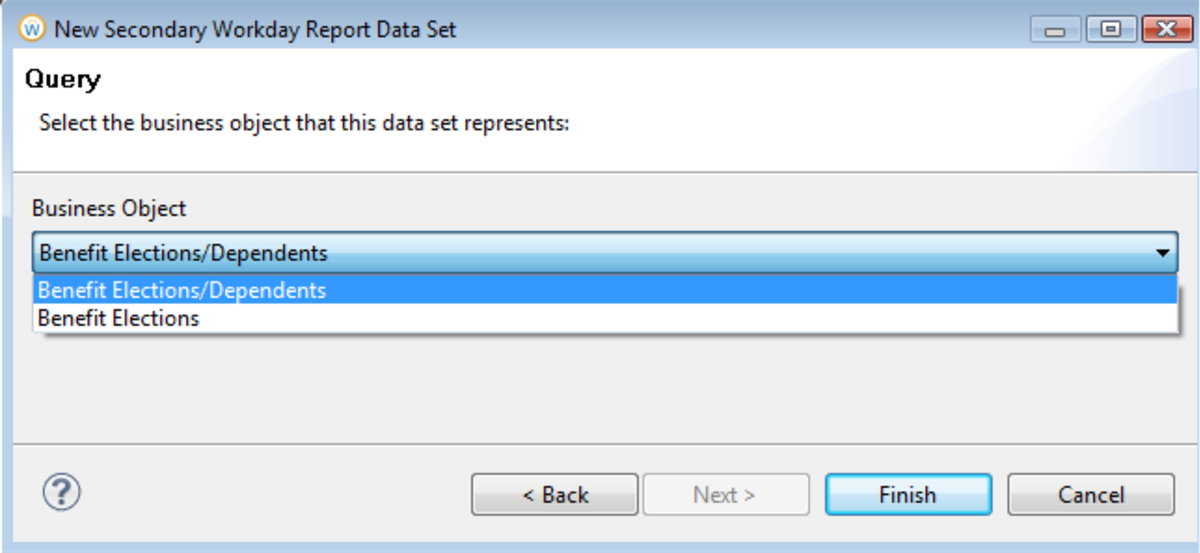
You can now create the secondary data set for the related business object. To do so, in the Data Explorer view, right-click the Data Sets folder, then select New Data Set. The New Data Set wizard opens. From the Data Set Type list, select Workday Secondary Report Data Set. Replace the default Data Set Name value with a new name.
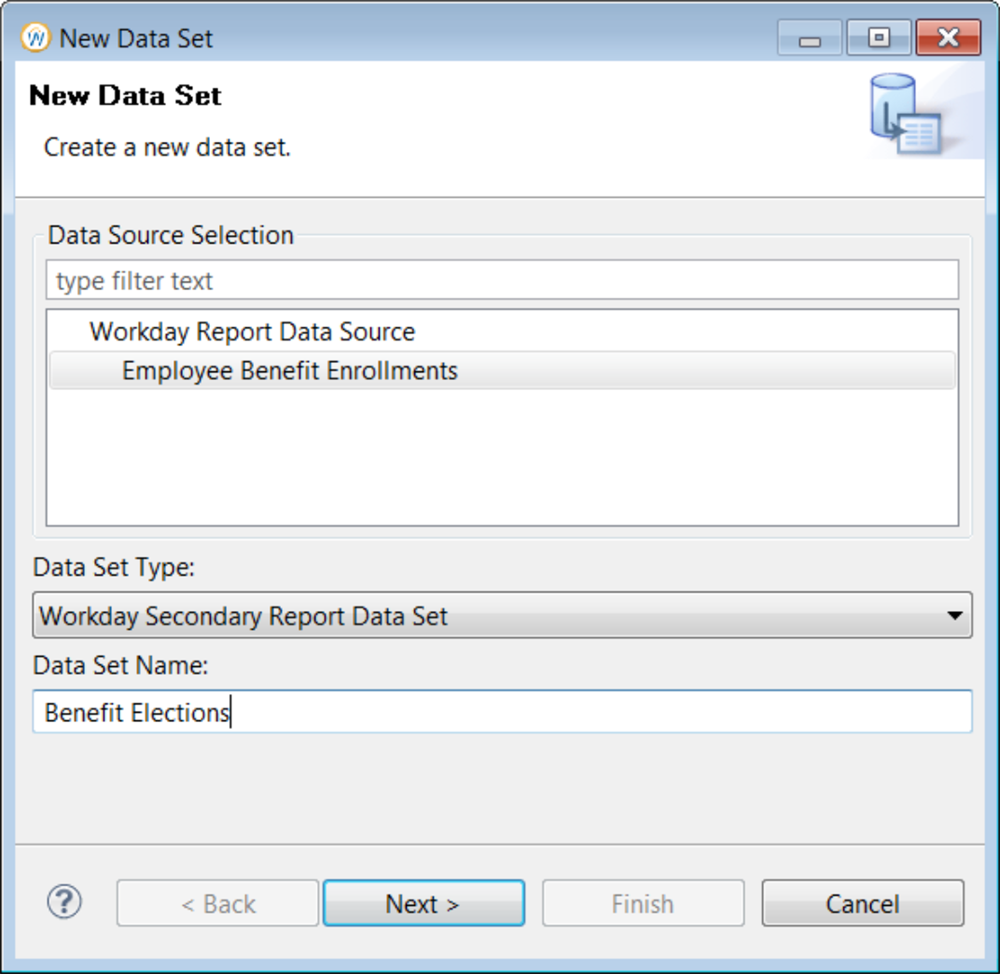
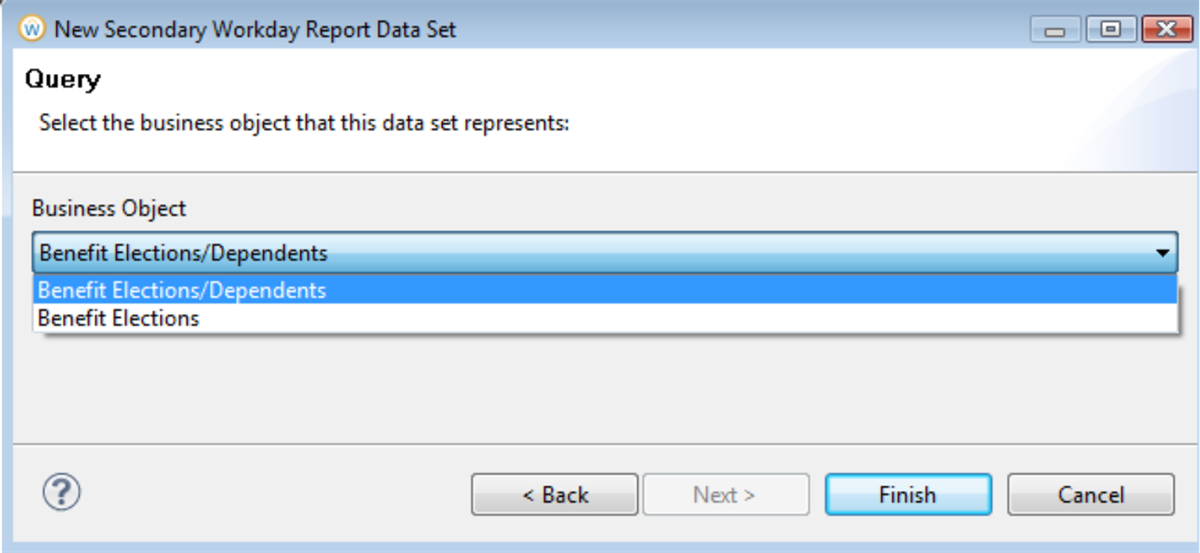
The Query screen is displayed, which allows you to select the business object. It will display all related business object and multi-instance fields included in the Workday Report.
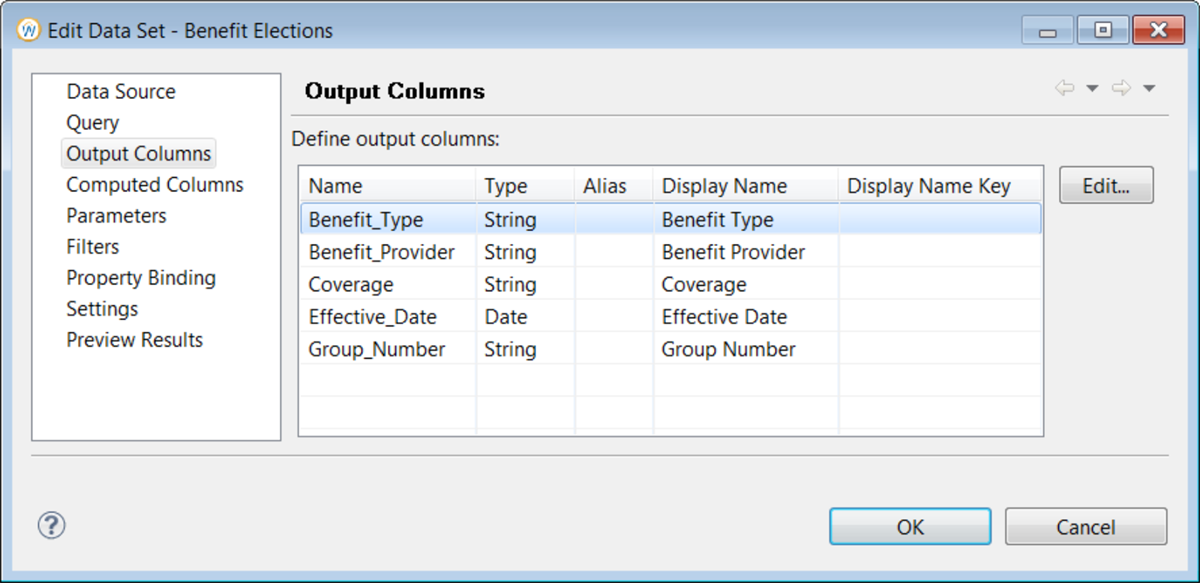
The Edit Data Set dialog box opens on the Output Columns page. This page displays the XML schema element values for each of the columns, which you added as rows to your custom report in Workday for the related business object, and their display names.
The Report Designer displays the following warning message about an empty PrimaryRowNumber input parameter value:
![Warning message reading, "There is an input parameter [PrimaryRowNumber] with empty value. Do you wish to leave it empty?"](/content/dam/ilx/workday-education/en-us/course-manuals/creating-reports-using-workday-studio-report-designer-birt/media/b3bdcf0d-b157-413d-a9a3-beac69271d93.png)
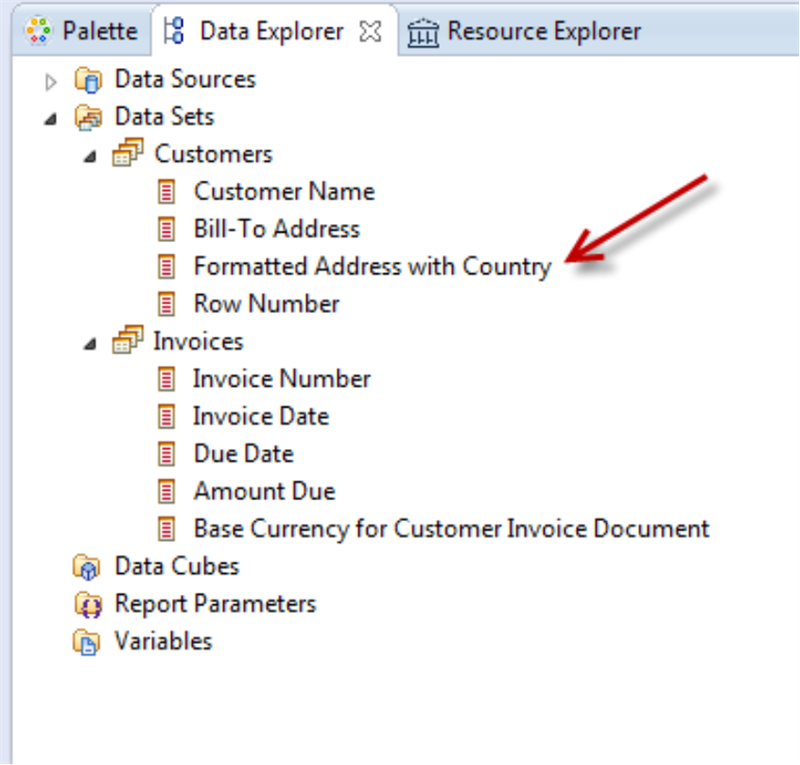
You can leave the input parameter value empty for now. You will configure this later, so select OK to dismiss the message. The Data Explorer view displays the new data set, with one node for each of the fields in the custom report that correspond to the related business object.
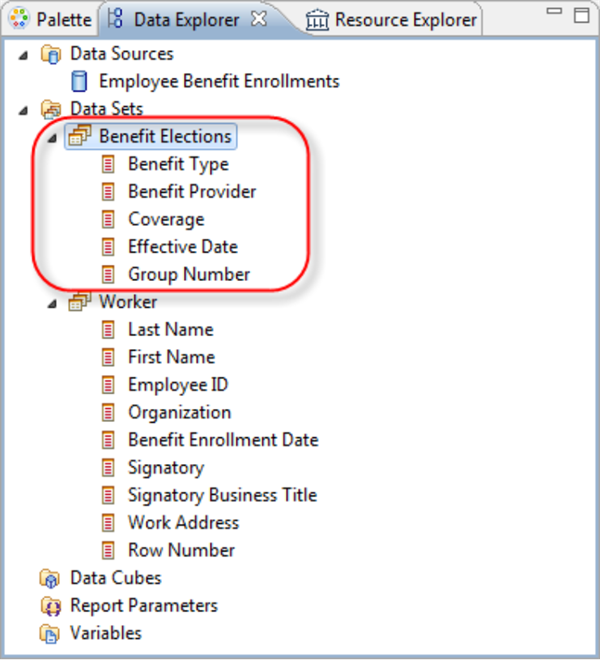
In addition to creating a data set for the primary business object in your custom report, you must also create a secondary data set for each Multi-Instance RBO and Multi-Instance Field.
If you take a moment to review your custom report fields in the Workday application at this stage, you will find that object that are multi-instance or multiply occurring field, as indicated by the multi-instance icon.
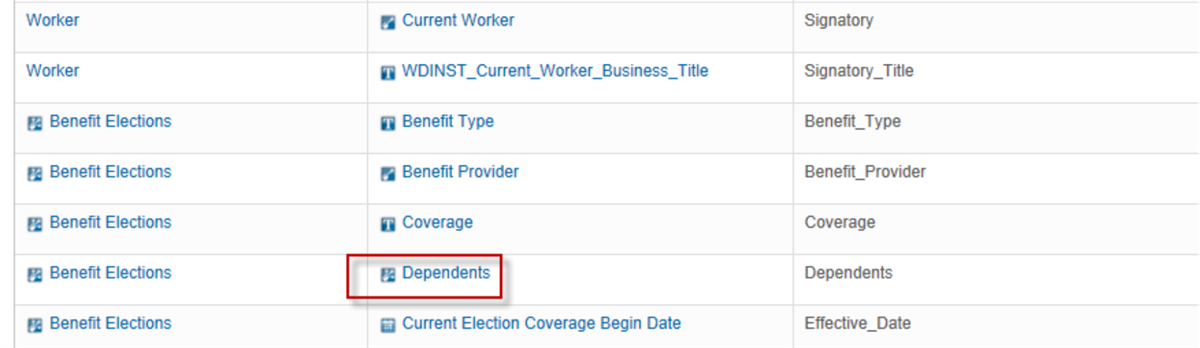
To create a data set for the multi-instance field, right-click the Data Sets folder, as before, then select New Data Set. From the Data Set Type list, select Workday Secondary Report Data Set. Replace the default Data Set Name value with a new name, for example, Dependents.
Data Set Bindings
You encountered a warning message about an empty parameter binding value, when creating the secondary data sets. To configure this value, on the Properties view of the related data set table, select the Binding tab, then select Data Set Parameter Binding. In the Data Set Parameter Binding dialog box, select the PrimaryRowNumber parameter, then selectt Edit. In the Edit data set parameter binding dialog box, select the JavaScript Syntax button to the right of the Value field.
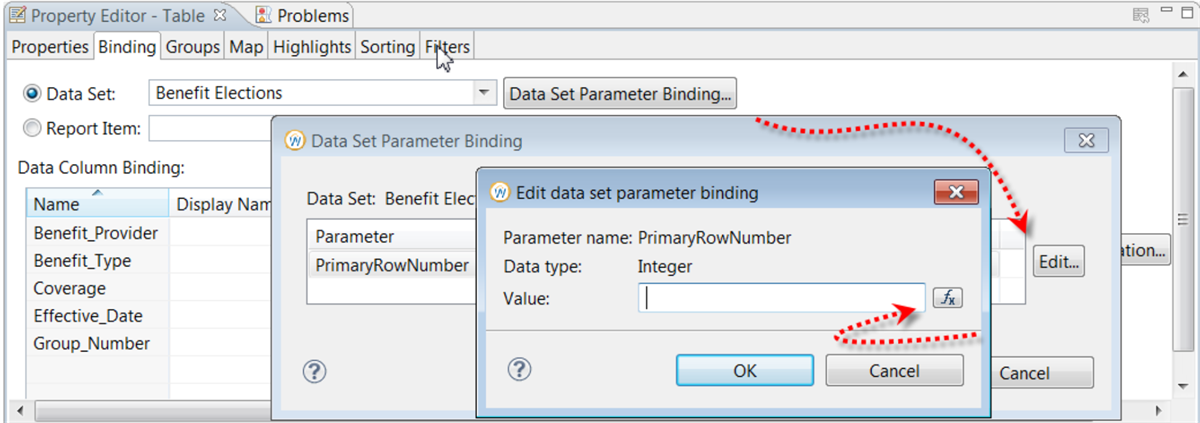
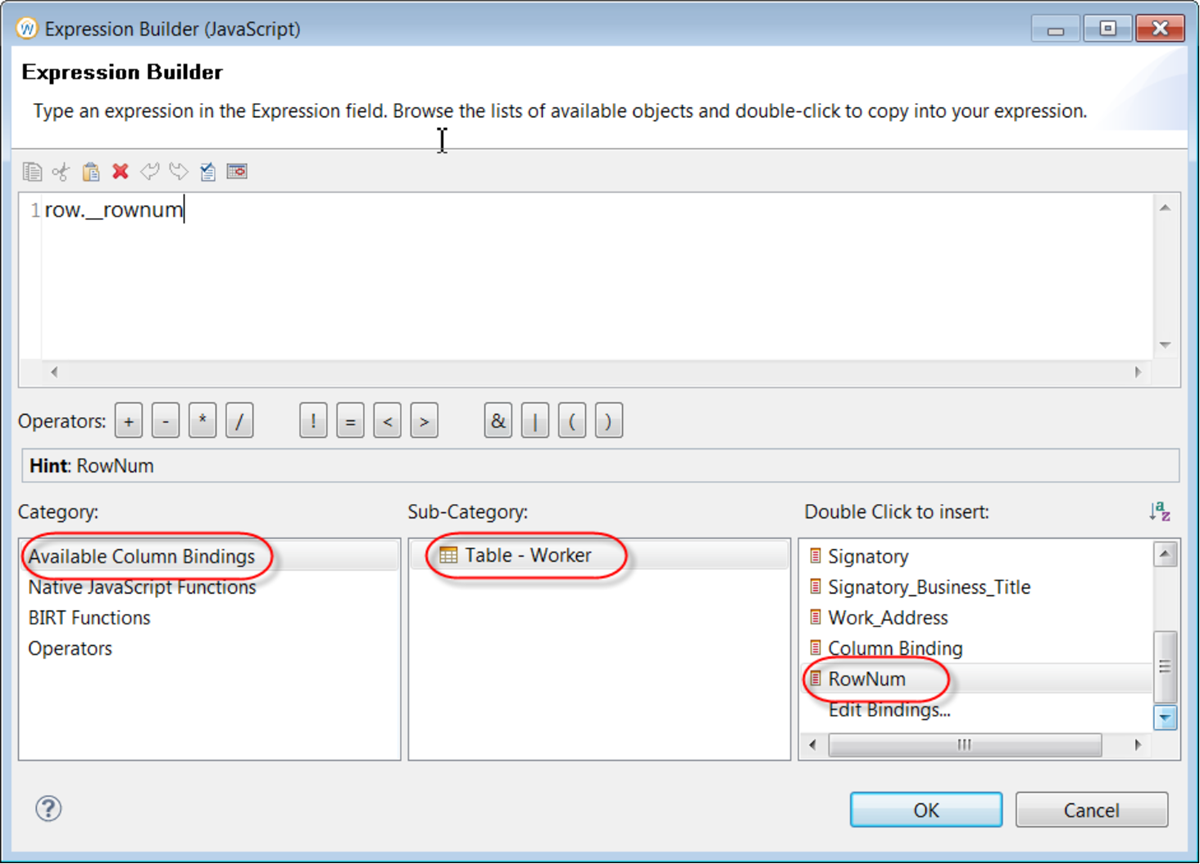
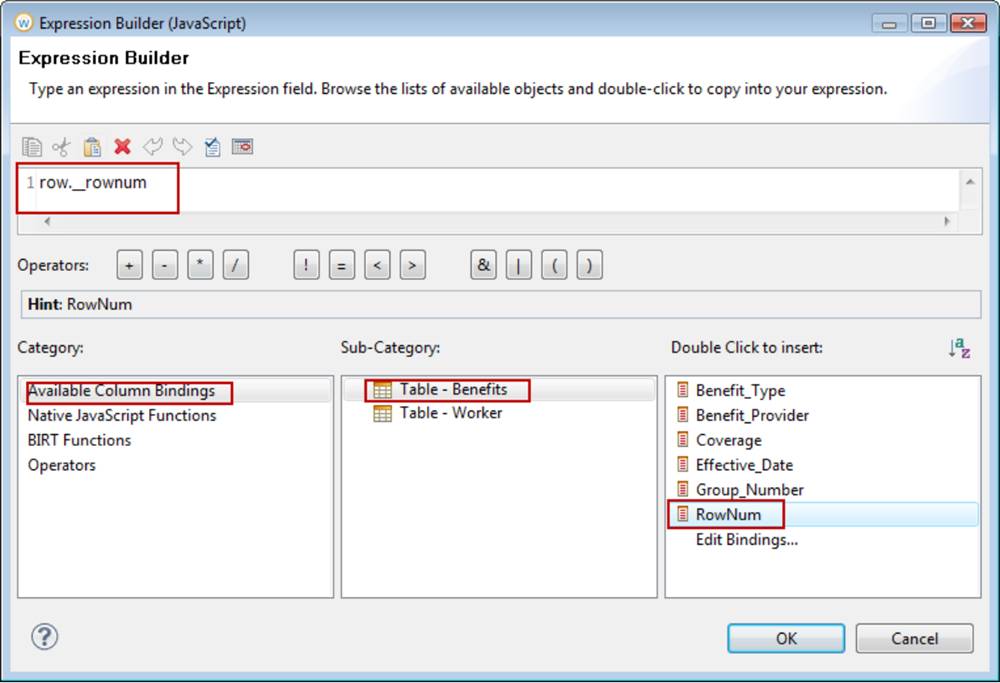
In the Expression Builder, from the Category and Sub-Category lists, select Available Column Bindings > Table, then double-click RowNum to insert an expression that returns the current row number, so that the corresponding related object details are returned for primary business object.
Multi-Instances
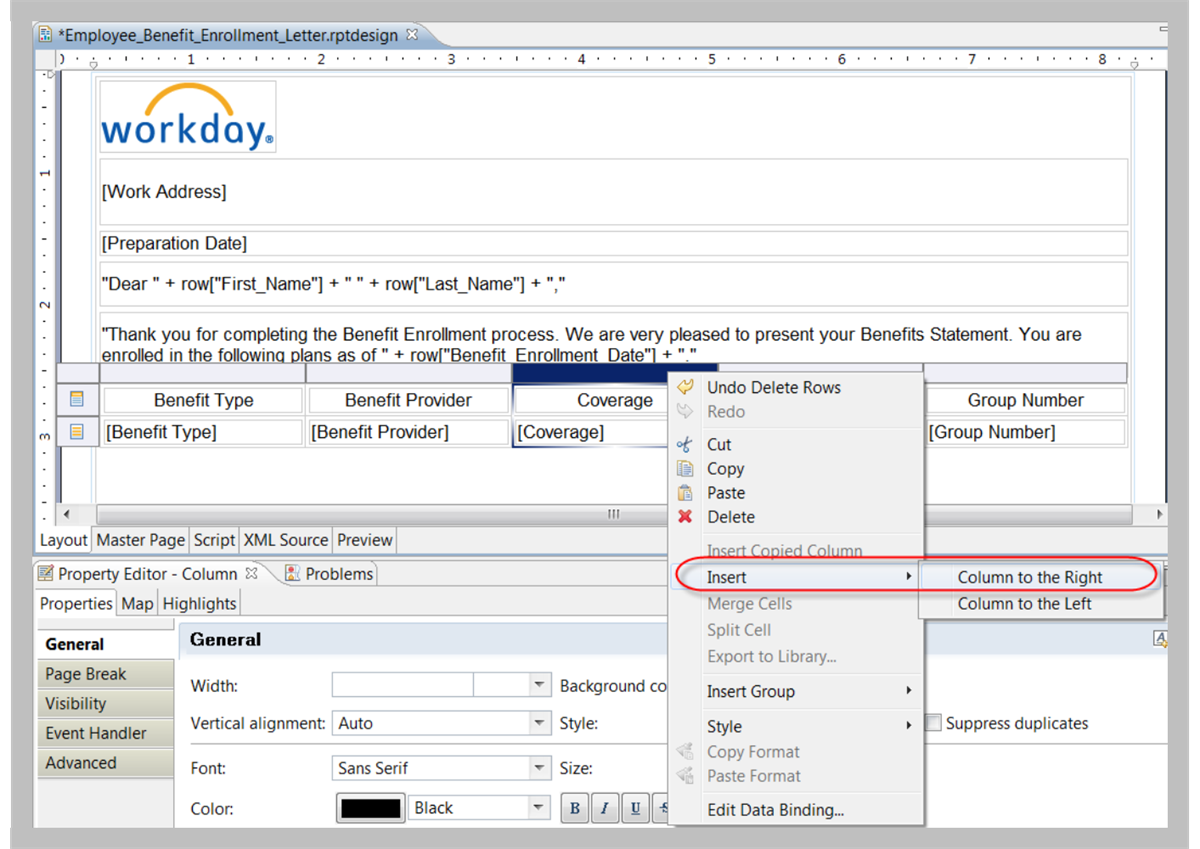
You can add a new column to the existing related object table, so that you can add the multi-instance data set as an embedded table. To do so, select the column guide cell, then right-click and select Insert > Column to the Right.
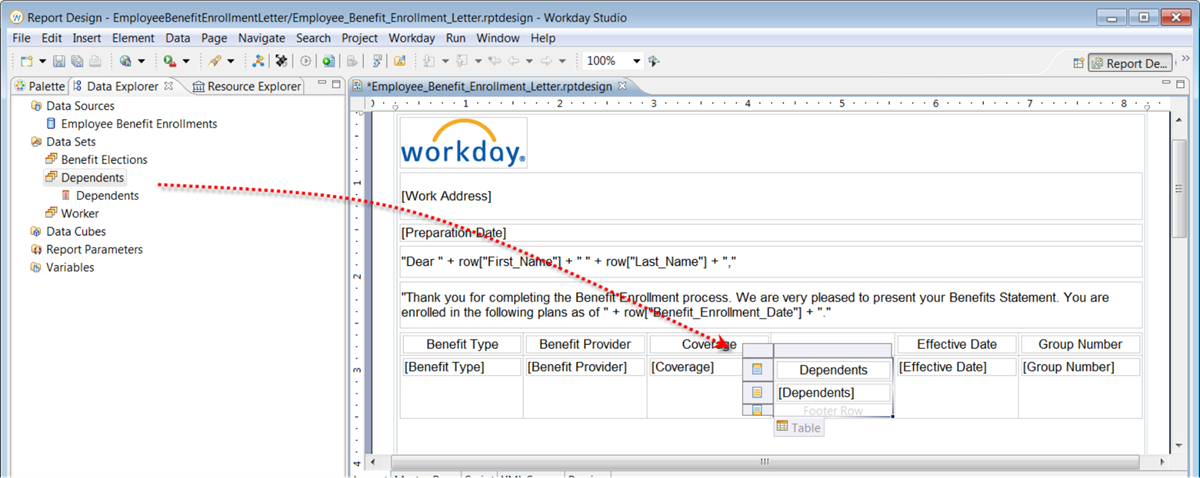
Drag the multi-instance data set from the Data Explorer view, and position it within the new column, within its detail row, which is the second row in the new column.
You need to resolve the warning message about the empty parameter binding values for this secondary data set. To configure these values for multi-instance data set, on the Properties view, select the Binding tab, then select Data Set Parameter Binding.
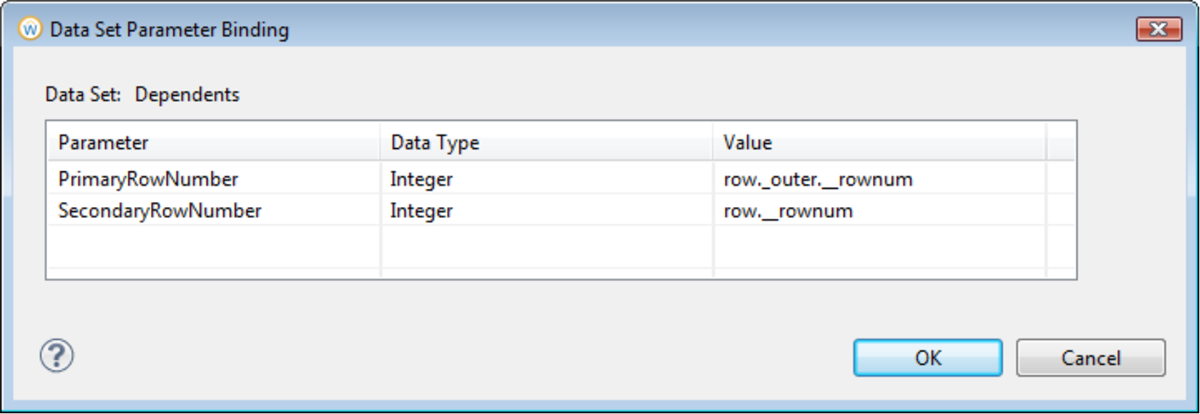
In the Data Set Parameter Binding dialog box, you need to set the following parameter values:
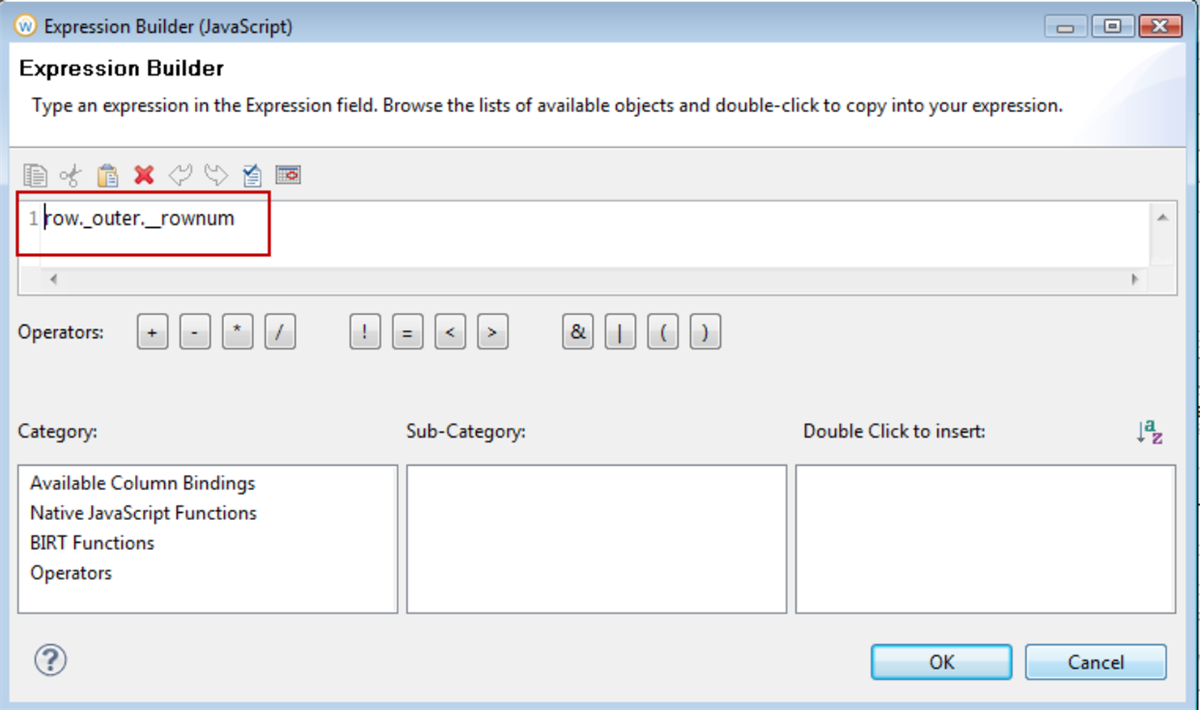
- PrimaryRowNumber: Select the parameter, then select Edit. Because the Multi-Instance table is nested two levels deep within the Primary Object table, you need to enter the following expression to return the current row number from the outermost table:
- SecondaryRowNumber: Select the parameter, then select Edit. In the Edit data set parameter binding dialog box, select the JavaScript Syntax button to the right of the Value field. In the Expression Builder, from the Category list, select Available Column Bindings.In the Sub-Category list, select the first Table item, which relates to the related business object data set column binding, then double-click RowNum to insert an expression that returns the current row number, so that the corresponding multi-instance details are returned for the related business object.
Primary Data Set Special Case
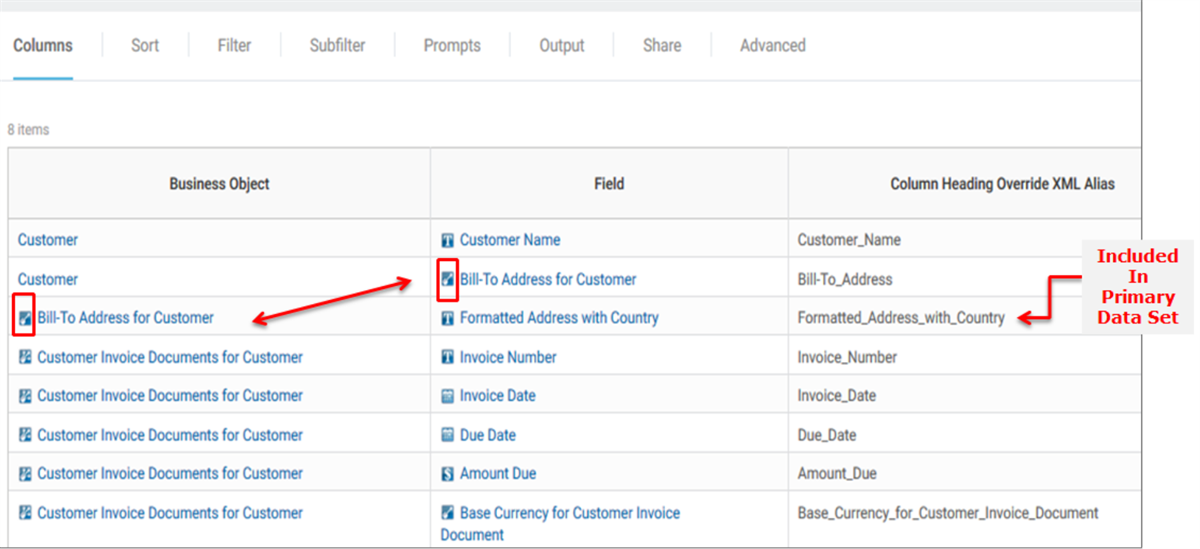
If a report field refers to another business object and there is a 1:1 relationship to the other business object, then the selected fields from the related business object are also included into Primary Dataset fields.