
Using Workday Web Services
Overview
Workday Web Services (WWS) operations access and update data in the tenant. Workday Studio provides tools to configure and test Workday web service requests. The assembly palette includes components that invoke WWS operations using SOAP API calls.
Objectives
By the end of this chapter, you will be able to:
- Review Workday Web Services (WWS).
- Prepare and execute WWS requests.
- Execute a WWS request using workday-out-soap.
Workday Public Web Services
Workday offers an open, standards-based Simple Object Access Protocol (SOAP) API for programmatic access to our on-demand business management services. The SOAP API Reference provides the API documentation for our multi-tenant, SOAP-based web services with corresponding WSDL and XML Schemas (XSDs).
Workday Studio includes a web services tester that can be used to connect to a specific web service operation to test requests and capture response messages. In order to invoke these services, the requesting user must have appropriate security permissions defined in the tenant.
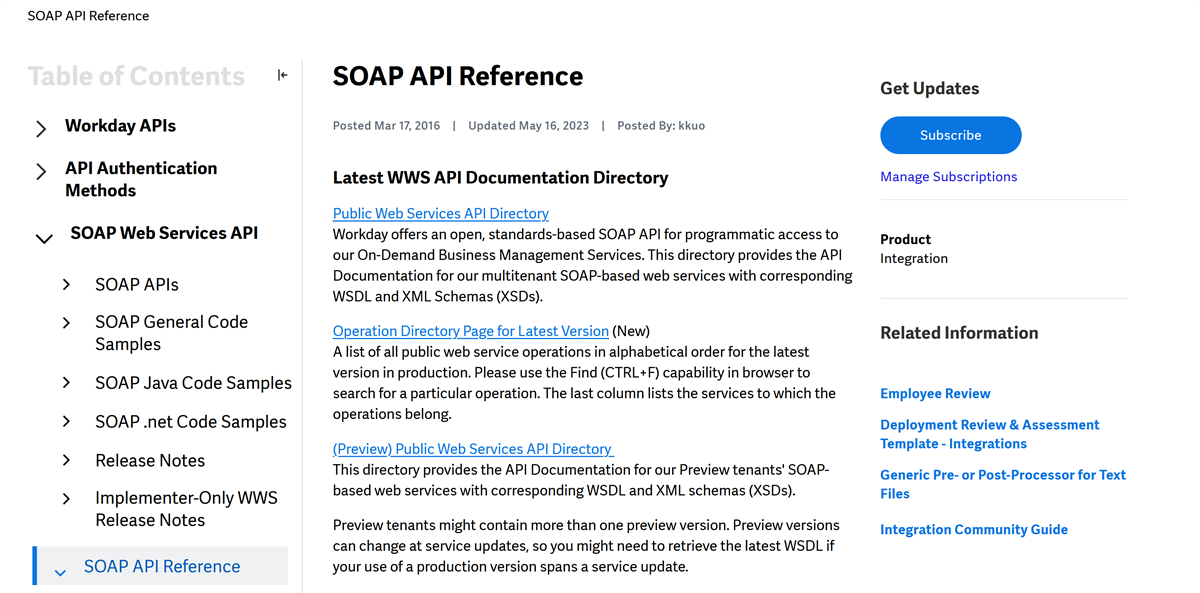
Every WWS operation is unique to the data or task it accesses. However, all Get WWS operations have four main elements:
- Request References allow you to specify one or more business object references. Use this section to select specific instances of Workday data (for example, Logan McNeil).
- Request Criteria limits the scope of data to be retrieved, based on filtering options specific to the operation (e.g., Exclude Inactive Workers).
- Response Filter limits how much of the dataset Workday returns to the requesting application. Page through the result set by using page and count parameters.
- Response Groups gives you control over what types of information to retrieve for each business object (e.g., Include Personal Data, Exclude Cost Centers).
Get operations also have a common set of response elements:
- The response echoes the set of elements from the request (Request References, Request Criteria, Response Filter, Response Groups) so that you can confirm what you requested.
- Response Results summarizes the retrieved data, including the total number of records and pages.
- Response Data includes all the requested data, limited by request criteria and the requesting user's security.
Web Services Security
A Workday web service operation is based on a business process or task. Each of these operations requires a security group in order to initiate the business process or task.
To find out which Workday web service contains a particular operation and to verify which security groups have permission to initiate the operation, access the
Public Web Services
report in Workday. Using the web service's Related Actions, select Security > View Web Service Operations Security Groups.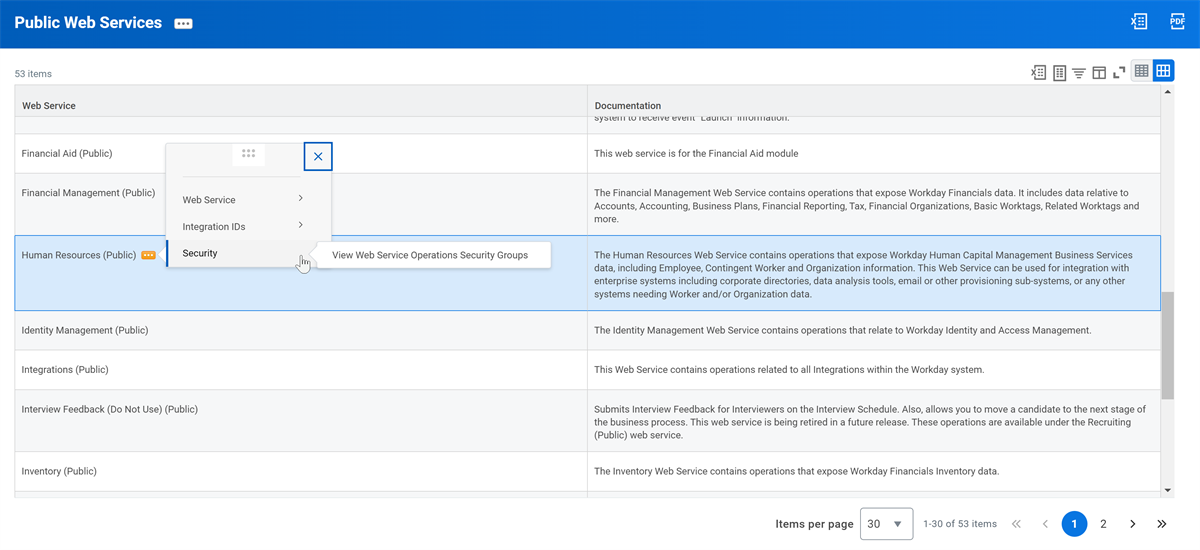
To protect system integrity and to encourage caution when granting access to web service operations, Workday does not assign default security groups to web service operations.
Review and Grant Security
You can access the
View Security for Securable Item
report and look up a domain item to view which security groups have access.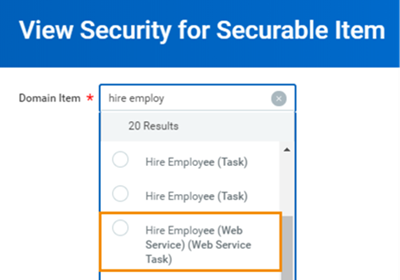
View security for securable item report
For example, when you select the
Hire Employee (Web Service) (Web Service Task)
business process, you can view the security groups required to initiate the associated business process.
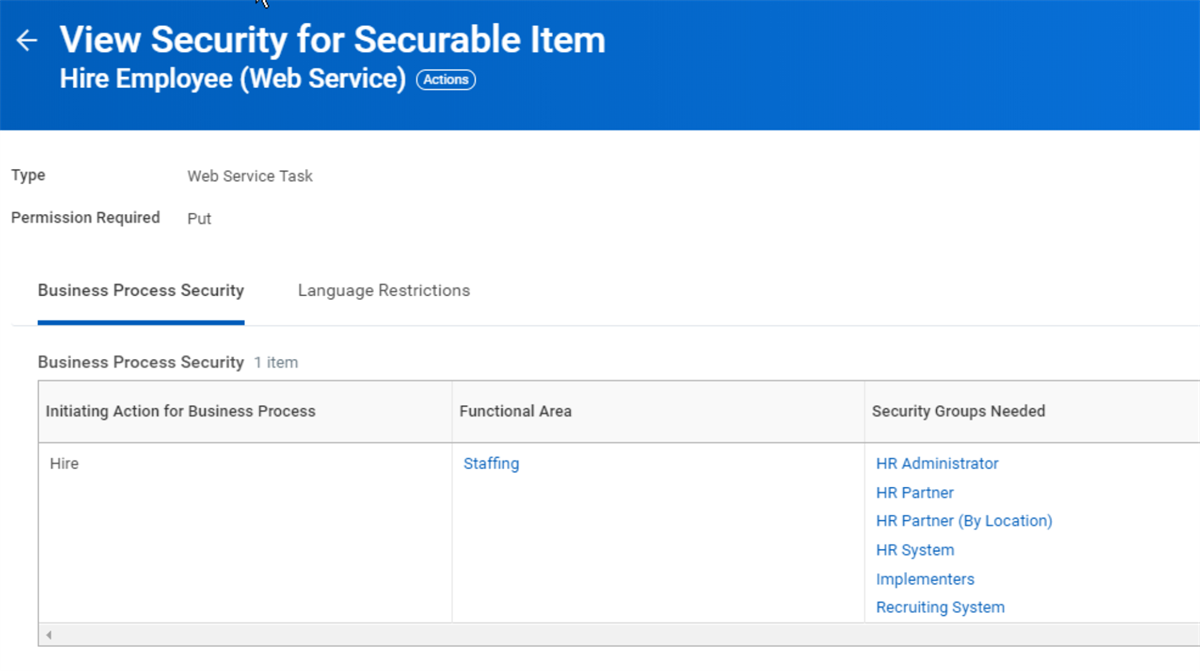
View security for securable item report - Hire Employee (Web Service)
Using the
Hire Employee
business process's Related Actions, you can edit the business process security policy and add or remove security groups.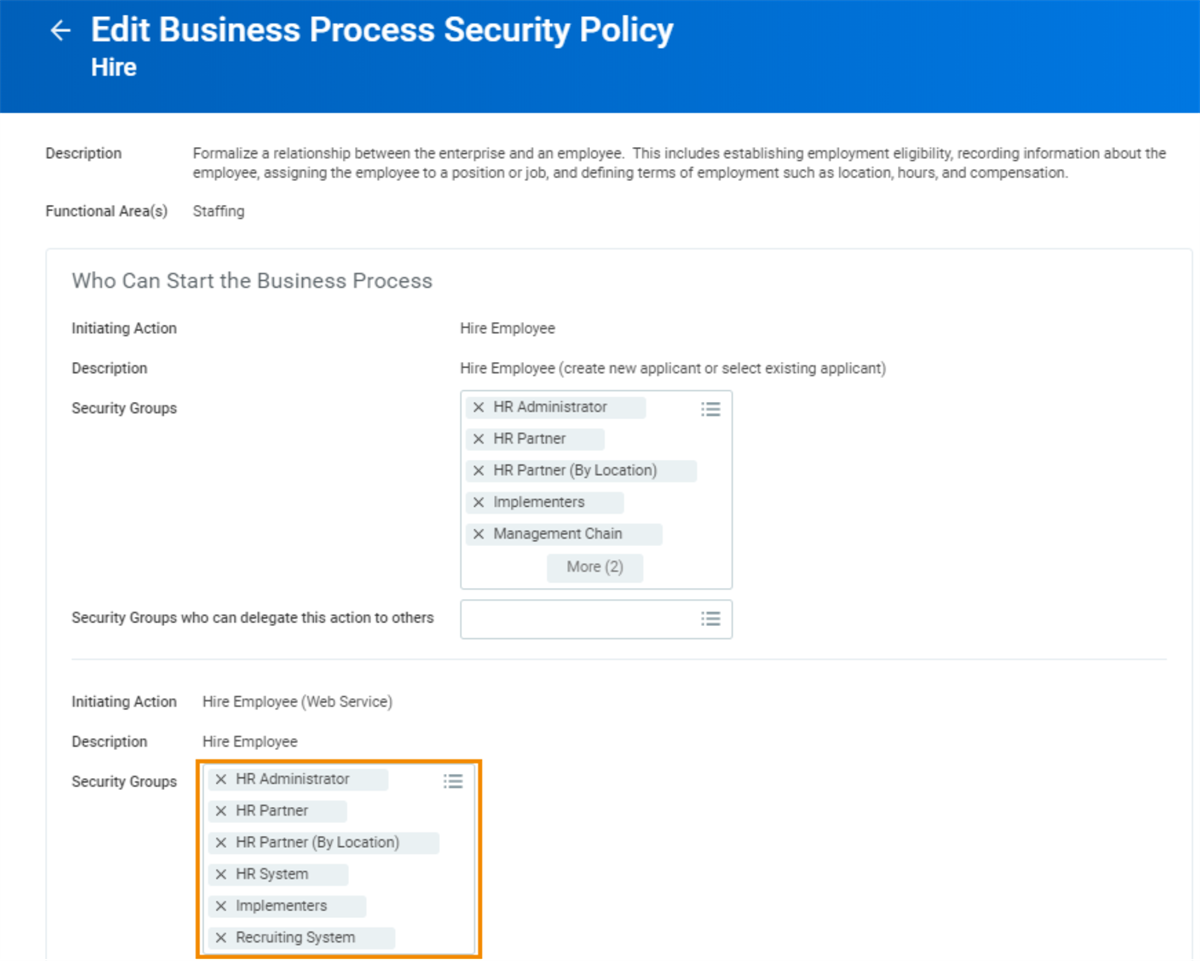
Edit business process security policy - Hire Employee
If you make a change to the business process security policy, you must run the
Activate Pending Security Policy Changes
task before the new changes will take effect.Note
: Rather than change the security policy, you can also use assignable security roles and user-based security groups to change the security of a user.Workday Studio Web Service Tester
The Schema Explorer view allows you to investigate the schemas of Workday and non-Workday web services in a read-only outline view. For Workday, the Schema Explorer provides direct access to the WWS Web Services Description Language (WSDL) and schema (XSD) documents. This allows you to explore WWS operations, messages, elements, and type definitions.
By default, the Workday Studio perspective includes the Schema Explorer at the top right. As with all perspectives, you can rearrange the placement of this view as part of your preferred layout. If the Schema Explorer is closed, you can open it by selecting Window > Show View > Schema Explorer (on Mac: Workday Studio > Show View > Schema Explorer).
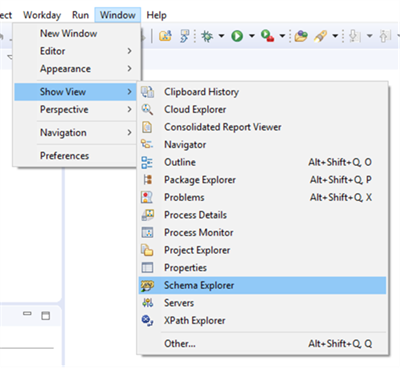
Schema Explorer menu item
To retrieve the most recent list of web services, select the arrow to the right of the "W" icon, then select "Add Latest Workday Web Services" and "wsdl." This will present a window showing the available web services for the default connection in the workspace.
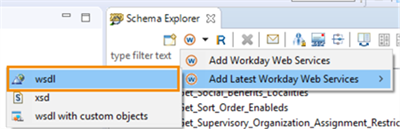
Schema Explorer
Verify the correct connection has been selected from the drop-down in the upper-right then select a web service and select OK.
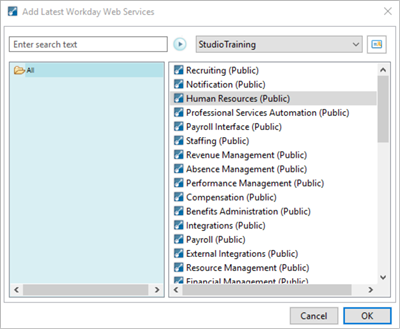
List of selectable web services
Expand the web service to view the list of its operations.
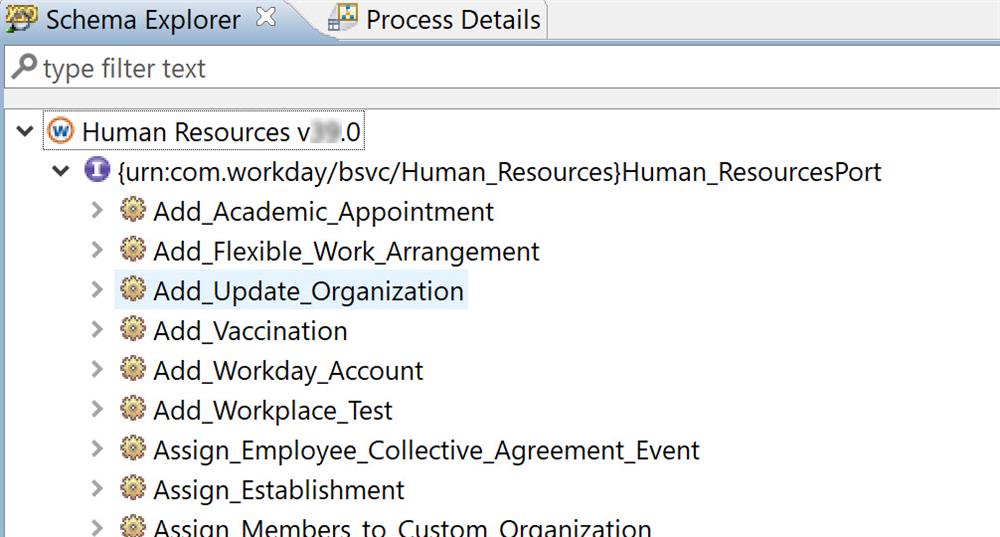
Note
: Workday Studio patches do not always coincide with application patches. If the Workday application patches to a newer version of Public Web Service API, the WWS versions pre-installed with Workday Studio will not reflect that version until it is patched. Using Add Latest Workday Web Services ensures the latest version of a wsdl is downloaded from the tenant.You can use the text filter to narrow the list of operations. Expand the operations in the Schema Explorer to learn more about its request and response messages.
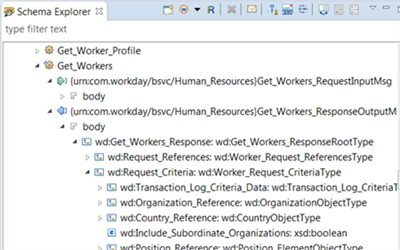
Schema explorer - filter
Many of the most popular outbound operations have a Workday Web Service Builder Wizard to assist with the creation of a request message. For operations where the Workday Web Services Builder Wizard is not available, right-clicking the name of the operation and selecting "Open SOAP wrapped request in Web Service Tester" will populate a sample request with all available elements and parameters as a starting point.
To generate a test request message using the wizard (when available), right-click the name of the operation (e.g. Get_Workers) and select "Workday Web Service Builder Wizard".
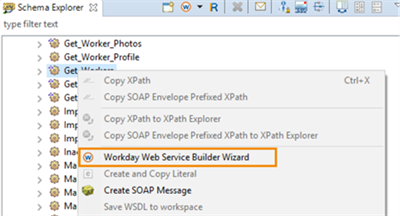
Web service builder - Create request message
Based on the specific operation you select, you will be presented with a series of criteria. Once you enter the criteria (e.g., response groups, page, and count), the wizard will generate a request message and open a WS Tester window.
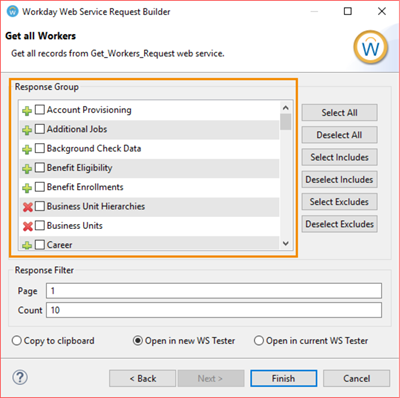
Workday web service request builder
Use the toolbar to send the request to Workday and review the response message.
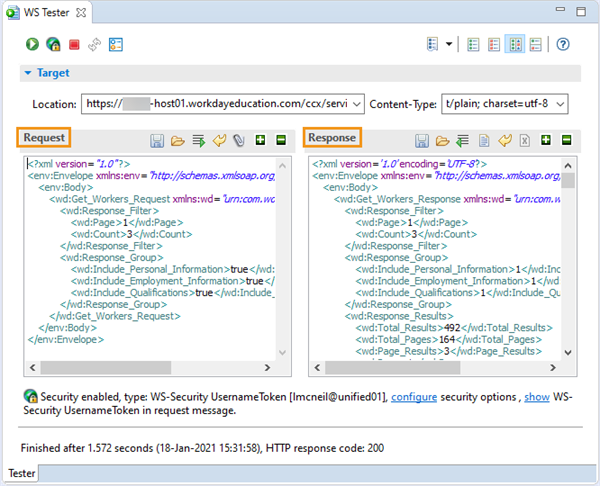
Request message WS Tester window
The WS Tester allows you to edit the request message for further testing. You can also open additional tester windows by using the Schema Explorer to generate another request for that operation.
Calling a Workday Web Service Operation from the Assembly
In order to execute a WWS request from a Workday Studio assembly, you must first prepare the request message. Then the workday-out-soap component executes that request and returns the response for further processing by your assembly.
Write Step
You will typically use the write step to stage a WWS request in a temporary memory holder called the "message".
The write step's Message Builder tab defaults to the message-content element, which you need to remove and replace by a text component. This is where you paste the request XML generated in the Web Service Tester.
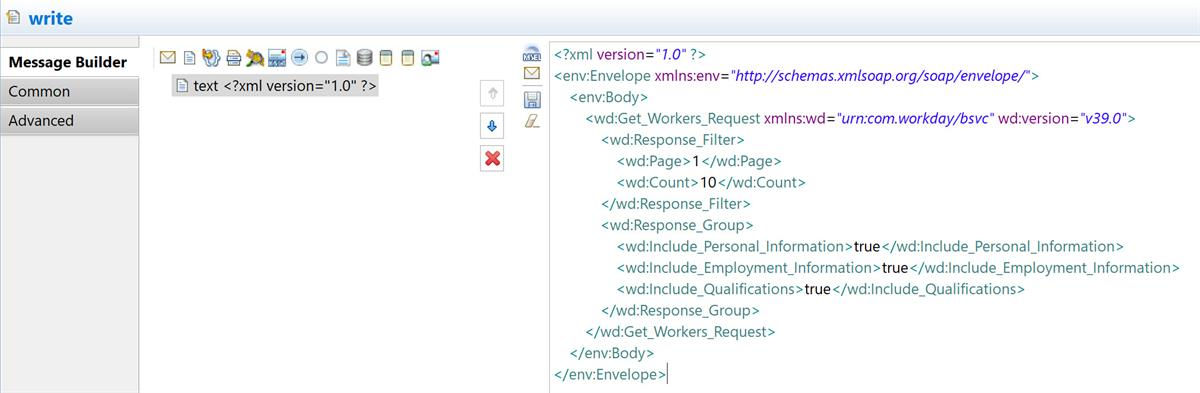
Workday-Out-Soap Transport
Workday-out-soap is a synchronous, request-response transport which sends a request message to a WWS endpoint and returns a response. Unlike most other out-transports where an endpoint URL needs to be explicitly set, workday-out-soap builds a WWS endpoint URL using the required Application and Version properties. The Application represents the web service being used (e.g., Human_Resources) and the Version defines the WWS API version (e.g., v40.0). This information is combined with the base service URL for the tenant to create a full Workday SOAP endpoint URL which looks similar to the following:
https://XXXXX-hostXX.workdayeducation.com/ccx/service/unifiedXX/Human_Resources/v40.0
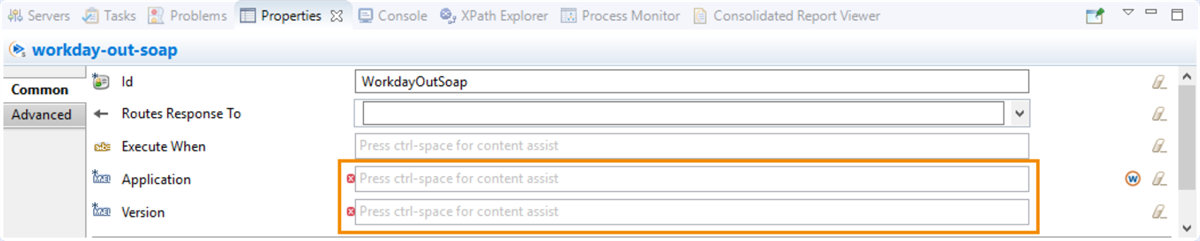
Workday-out-soap transport
Important
: Workday-out-soap does not provide a field to enter or modify the request message itself. You must create the request message to send to Workday (e.g., by using a write step).Workday responds to the request made by the workday-out-soap transport with a response. It is up to your assembly to capture the response message and perform further processing, such as transformation and storage.
Workday Community – Workday Web Services Best Practices
Workday Studio integrations have a two-hour processing time limit. This seems to be the most common matter of interest among customers. There are a few common contributing factors:
- excessive web service calls
- excessive report invocations
- using inbound web service operations
- large volume of data
Resource
: For more information on Workday web service guidelines, refer to the WWS Best Practices page on Community.Workday Web Services
There are several recommendations when using Workday Web services:
- Use the most recent version of the web services API for optimum performance and stability.
- Specify a Workday Web Services version in requests to ensure the request/response model remains stable.
- Use theDescriptorattribute to improve the human readability of XML documents especially during development. Descriptors can change in both format and value therefore the use of descriptors as an index, identifier, or to drive other data is not recommended. To improve performance, consider removing descriptors before deploying your integration to Production.
- Make sure you are using the Import Workday Web Service operation (if available) when handling a large volume of inbound data.
- Use the PagedGet common component if you are processing a large volume of outbound data and need to automatically invoke Workday Web Services requests for each page of data.
- When using the PagedGet component, specify an As_Of_Entry_DateTime in your request XML (part of the Response_Filter element) to ensure that the dataset that you are retrieving does not change as you are processing pages of data.
Understanding the Store Step
The
Store
step in Workday Studio saves messages during integrations. This allows you to capture a message's state at any point, which is essential for debugging, auditing, and troubleshooting.The Store step provides several key benefits:
- Persistence:Saves a copy of the message, ensuring it remains available even if the integration fails or restarts.
- Flexibility:Store various message types, including XML, JSON, and plain text.
- Accessibility:Retrieve stored messages later using theRetrievestep for examination or input into other integrations.
- Debugging and Auditing:Inspect the state of messages at various points and create an audit trail for compliance and troubleshooting.
- Error Handling:Capture error-causing messages for troubleshooting.
Keep the following considerations in mind when using the store step:
- Message Size:Individual messages are limited to 1 GB (compressed); the cumulative limit is 3 GB (compressed).
- Performance:Excessive use can impact performance. Use strategically at critical points.
- Security:Protect sensitive data with encryption or data masking.
Storing a Document in the Workday Blobitory
The store step creates a persistent copy of a document and saves it to your tenant's document repository also known as the Workday Blobitory for later access.
Its properties are as follows:
- Input:Specifies which object in the mediation context contains the document to be stored. This is typically set to message or variable depending on where your data is.
- Output:Specifies which object in the mediation context receives metadata from Workday about the document that was stored in the blobitory. This metadata file is in Atom Syndication Format and includes information about the stored document such as the document name, publication date, expiry date, size, if encrypted, and if compressed. This can be set to message or variable depending on whether you need this information in other components.
- Expires In:Specifies how long the blobitory should retain this document before removing it. This value needs to be expressed in XML duration format. For example, to specify 1 year, 3 months, 5 days, 8 hours, 45 minutes, and 10 seconds, enter P1Y3M5DT8H45M10S. The default value is P7D which is 7 days.
- Title:The file name of the document.
- Create Document Reference:A Boolean value, which is set to true by default. When true, the store step automatically calls the PutIntegrationMessage subassembly to add the document link to the integration event. This is an easy way to create this link, however it has limitations.
Adding a Link to the Document in the Integration Event
The most common method to deliver Workday Studio output involves building an assembly that creates a simple document, stores it in the document repository (otherwise known as the Workday Blobitory) with a link to the document in the integration event. A business process then delivers the file to a target system using a delivery service step.
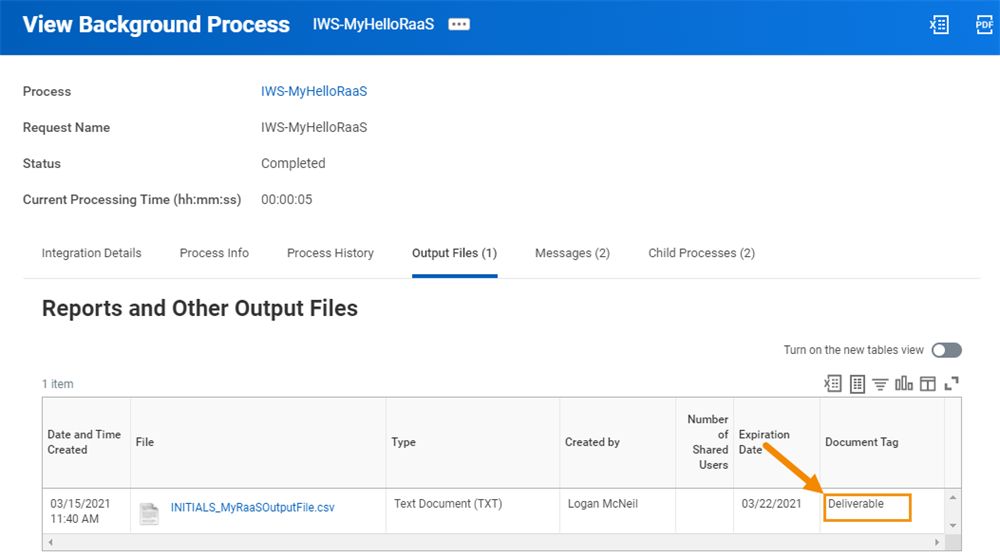
Output File with Deliverable Document Tag
The PutIntegrationMessage subassembly creates the link to the document in the integration event via a message. Once linked, the document is viewable from Integration Events report in the tenant in both the Output files tab and the specific integration message in the Messages tab. It is also accessible by the launching user (or ISU account) in their My Reports folder.
You can either have the store step call the PutIntegrationMessage subassembly itself, or you can call it explicitly for more control.
Store and PIM Options
Option 1: Store step calls the PIM:
The store step can call the PutIntegrationMessage subassembly if you set the Create Document Reference property to true, eliminating the need for you to call a PIM yourself . It will use the following parameters on the call to the PutIntegrationMessage subassembly:
- is.message.severity: INFO
- is.message.summary: Value provided in the Summary property. If Summary property is not set then the value provided in the Title property.
- is.document.deliverable: false
This method of linking the document to your integration event is easy but inflexible, since you have no control over the parameters passed to the subassembly. It sets the is.document.deliverable parameter to false which results in the document not being tagged as Deliverable. As such, this option is only suitable for log, audit, or other files you don't intend to deliver to an external endpoint. This option should not be used if you need to deliver the document.
Option 2: Call PIM Explicitly:
Rather than having the Store step call the PIM, you can call it explicitly, giving you more control over how the document link is added to the integration event, specifically around document tagging. In order to use this option, you need to:
- On the store step, set the Create Document Reference property to false so the store step does not call a PIM .
- On the store step, set the output property to variable and provide a name for the variable.
- On an existing or new PIM in your assembly, set the is.document.variable.name parameter to the variable name specified in prior step. This is how the PIM knows which document in the event to link and tag.
Unlike when the store step calls a PIM, the is.document.deliverable parameter is defaulted to true when you explicitly call a PIM. This means no additional parameters are needed for your document to be deliverable. You may set additional parameters that affect the stored output, however, including additional labels or a different document owner.
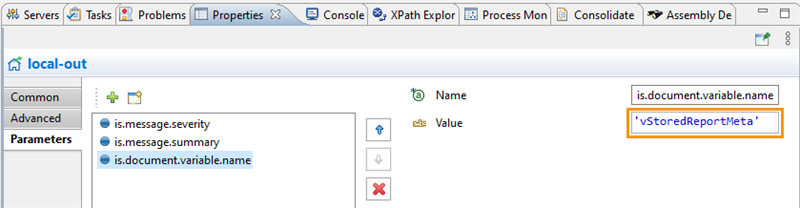
PutIntegrationMessage parameters