
Orchestrations
Overview
Orchestration Builder is Workday's tool for orchestrating real-time event-driven processes across Workday and other external systems. The processes you create with Orchestration Builder are called orchestrations.
In this chapter, we will discuss orchestration design considerations and requirements. You will add an orchestration to your app, and talk about the different tools available as you build out your orchestration.
Objectives
By the end of this chapter, you will be able to:
- Explain orchestration requirements.
- Explain asynchronous vs. synchronous orchestration.
- Create and configure an orchestration.
Workday Orchestrate
Workday Orchestrate enables developers to construct lightweight, event-driven processes and tasks within their Workday Extend apps.
With orchestrations, you can trigger business processes, map data, send notifications, define logic conditions, and interact with both Workday APIs and third-party APIs.
Use orchestrations for small transactional data, not for heavy data processing.
Some of the use cases for orchestrations are:
- Apps that need to process data through multiple lightweight API calls.
- Apps that need to launch an application business process wait for a response and then continue the processing.
- Apps that need to trigger multiple API calls in a single event.
- Apps that do not have a visual presentation component (i.e., headless apps) and need to make multiple Workday API calls.
- Apps that need to interact with Workday SOAP APIs in a lightweight manner.
Orchestration Templates
When you create a new orchestration, you can choose from one of several existing templates. Some commonly used templates include:
- Synchronous (sync): A system (e.g., an Extend app) invokes the orchestration, the orchestration processes what it needs to in real time, then the orchestration returns an immediate response to the invoking system. Use this template for:
- Self-service apps that need Workday responses to successful data updates.
- Lightweight apps that can process quickly.
- Asynchronous (async or mixed): A system invokes the orchestration, the orchestration responds first, and then the orchestration continues running in the background. This async process is a "fire and forget" pattern. Use this template for:
- Apps that don't require an immediate Workday response.
- Apps that need to process a large amount of data.
- Workday Business Process: This orchestration can be triggered by a Workday-delivered or Extend business process.
A Workday Extend page or API call can trigger an orchestration. Third-party systems can also trigger both synchronous and asynchronous orchestrations via an inbound API.
Accessing Workday Orchestrate
You can find the Orchestration Builder on the Workday Developer Site. You can view your app's orchestrations or create a new orchestration via:
- Your app's overview page, on the Overview tab.
- App Builder, by selecting Orchestrations in the left sidebar.
Orchestration Builder
The Orchestration Builder tool allows you to visually build orchestrations, using a drag-and-drop UI, to chain together components. Workday processes orchestration steps from top to bottom.
Orchestration Builder automatically populates every new orchestration with Start and End steps. To build your orchestration, drag additional components from the Components panel into the orchestration flow, and configure their properties.
To create an orchestration, do the following:
- On your application page, select + Add Orchestration. Name your orchestration and, optionally, add a description.
- Select a template for your orchestration (sync or async).
- To add a new step to your orchestration, drag a component from the left Components panel and drop it where you want it, between the Start and End steps.
- Select a component step to display its Properties panel on the right. Optionally, edit the step's Description and Reference Name. The Reference Name is the name you use in the Expression Builder to refer to a step from other steps.
- Select Edit Properties to adjust the component step's functionality. Save your changes to any properties before closing the edit page.
- Once you have added and configured all of your components, select Validate in the orchestration toolbar to check for errors.
- When your orchestration validates with no errors, select Save to App Hub.
- Deploy or redeploy the app that calls the orchestration.
Deploying an Orchestration
You can execute your orchestration two ways: from an Extend app, or a headless app.
From Extend, you execute with a typical API call. You can pass parameters from a page, and return data to the app in a number of formats.
Headless apps are apps that do not use a visual presentation component. These apps can make an API call from anywhere. You do not need an Extend page to run this app. Headless apps can still pass parameters and use the API gateway for authentication and security.
Orchestration Components
Orchestration Builder groups components into the following three categories:
Data Requests
To get data from an API, include one of the Data Request type components:
- Send HTTP Request
- Send Workday API Request
Then, downstream in the orchestration, you can refer to the API you just called and make use of the data retrieved in that step.
Async orchestrations can also include a Trigger Business Process component.
Data Operations
Use the Data Operations type components to perform operations on your data:
- Create Values
- Create Text Data
- Create JSON
- Treat as JSON
- Convert JSON to XML
- Treat as XML
- Convert XML to JSON
- Wrap SOAP
- Unwrap SOAP
Orchestration Logic
Use the Orchestration Logic type components to control the flow of processing in your orchestration:
- Continue on Conditions
- Branch on Conditions
- Log
Expression Builder
Access Data
Select the Plus button within Expression Builder. Then, enter a string or use the pull-down menu to access data from your orchestration upstream steps, your attribute store values, or global functions.
Note
: At any time in Expression Builder, you can access the original request payload, which includes any parameters coming from the system that called the orchestration. The Start orchestration step contains this payload, but it enters the orchestration as type Data. Therefore, you will need to use a component step, such as Treat as JSON, to tell the orchestration that this payload data is JSON data.Functions
Once you have accessed the data with Expression Builder, you will want to perform functions on that data in order to:
- Extract a piece of the data (e.g., individual values in a payload).
- Do common functions on the data.
- Create new values from the data (for use downstream).
In Expression Builder, select the Function button on the right side of the data expression. All available functions for that data type appear.
Conditions
Expression Builder conditions allow you to perform logic on a value in real time to produce a specified result. Select the "Add condition for value" icon in Expression Builder.
Specify the conditions, and then set the values for if the condition is true and if false.
Text Templates
The Create Text Template component allows you to implement template functions into text documents for use with orchestrations.
You can create the following documents:
- application/json
- application octet-stream
- application/x-www-form-urlencoded
- application/xml
- text/csv
- text/html
- text/plain
- text/xml
Important
: Insert template expressions in your text document between curly braces. For example:{{data.start.$_workerID}}
The template runtime is fully streaming, allowing you to embed multiple large documents without impacting efficiency.
Create Text Template supports the following features:
- Conditional inclusion
- Looping
- Aliasing
- With statement shorthand
- Data statement shorthand
- User-defined functions
- Template naming
- Commenting
Launching REST APIs with Orchestrations
You can use orchestrations to launch REST APIs that interact with:
- Workday-delivered business objects
- Extend model component business objects
- Workday Studio
- Reports as a Service (RaaS)
- Third-party applications
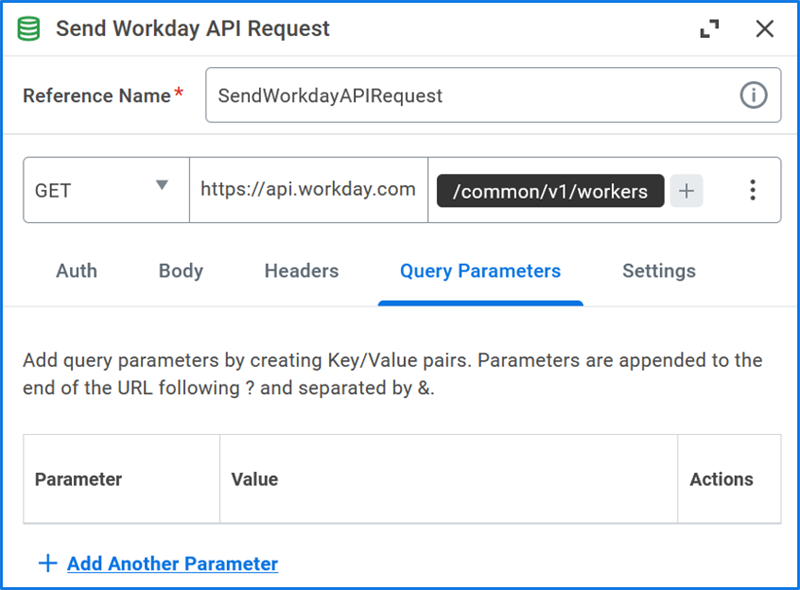
To call a Workday API from within an orchestration, use the Send Workday API Request step.
HTTP Retry
You can define HTTP retry policies to specify:
- How often Orchestration Builder retries a failed HTTP request.
- The conditions under which Orchestration Builder attempts a retry.
You can apply your defined HTTP retry policies to these Data Request components:
- Send HTTP Request
- Send WWS Pagination API Request
- Send Workday API Request
Orchestration Logic
Log
Use the Log component to return a specified message in the orchestration's Message property. You can add conditions within the Log component.
Branching
Use the Branch on Conditions component to split off an orchestration into two separate paths of steps, based on a condition.
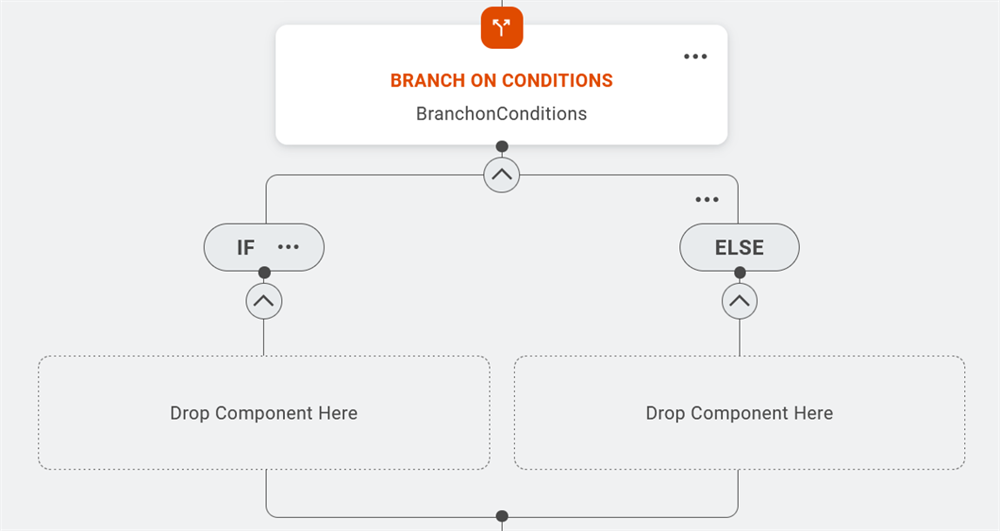
Branching is meant for lightweight processes rather than heavy error handling. Use Workday Studio if you require complex error handling.
Tip
: Accessing values located within a branch from outside of the branch is a little tricky. Include a Create Values component on both sides of the branch, with the same name.Orchestration Attributes and Credentials
Orchestration Attributes
Orchestrations can access attributes defined for your app. Attributes enable you to configure app-level, tenant-specific variables that your Workday Extend app can access during runtime. For example, your app might have an attribute for a feature flag Boolean value that controls whether a certain feature is visible in that tenant.
Create an attribute via the App Overview page.
Use the
App Manager
report in Workday to define different tenant-specific values for those attributes.Orchestration Credentials
You can create credentials that Orchestration Builder hard-codes into the source code.
Create an orchestration credential via the orchestration's Settings, Credentials tab. You can access these credentials for use in the Send HTTP Request component.
Launching an Orchestration
To launch an orchestration from a PMD file, you must:
- Locate your orchestration URL. (This can be found in the Settings menu in Orchestration Builder.) Example:https://api.workday.com/orchestrate/v1/apps/{yourAppId}/orchestrations/{YourOrchestrationName}/launch
- Add a deferred endpoint to your PMD file and configure it to use your orchestration URL. Example:{"name": "postOrchestration","url": "YOUR-ORCHESTRATION-URL","httpMethod": "POST","authType": "sso","onSend": "<% { ... } %>"}
- Invoke the deferred endpoint when you want to call the orchestration. Example:"onChange": "<%const result = postOrchestration.invoke();widgetId.value = result.someFieldFromYourOrchResponse;%>"
Logs
You can view these log fields for your apps on the Logs tab of the Analytics dashboard or the App Overview page.
Note
: Workday permanently deletes log files that are older than 30 days. If you need to keep them for longer than 30 days, users with a company role of Admin can download logs from the Logs tab of the Analytics dashboard.Depending on what you are investigating, the Logs tab may show you much more data than you are looking for. You can use log filters to focus on only the logs that are relevant to your investigation. The following table includes some log filters that may be helpful:
Field | Description | Example Values |
|---|---|---|
wd_category | Category of app information this log is about | console , mobile , pageError , responseError |
wd_common_request_id | Random, unique ID that tracks an incoming HTTP request throughout all downstream requests | WCPUI-APP-PREVIEW|5a438101-0f47-4cfa-a3a5-a84c13c3252b |
wd_env | Information about the tenant that generated the log | WCPDEV , IMPL , SANDBOX , PROD |
wd_level | Category of urgency, for troubleshooting and debugging | ERROR , WARN , INFO , DEBUG |
wd_response_code | The API response code | 200 , 400 , 404 , 500 |
wd_service | Code for the Workday service that generated the log | api-gateway , orchestrate , wcpui |
Continue on Conditions
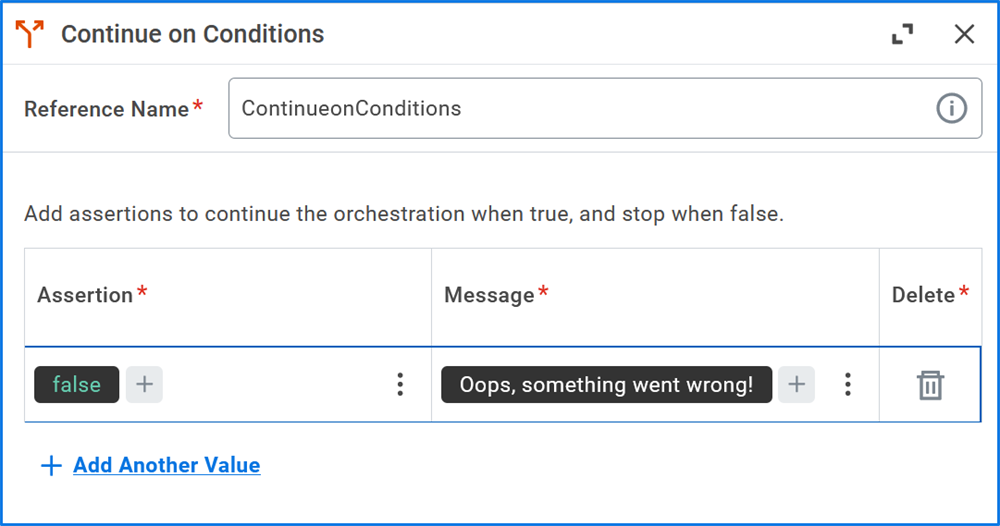
Use the Continue on Conditions component to evaluate a condition and continue the orchestration steps only if the condition is true. If the condition is false, the orchestration stops, and Orchestration Builder logs the message you specify.
Error Handling
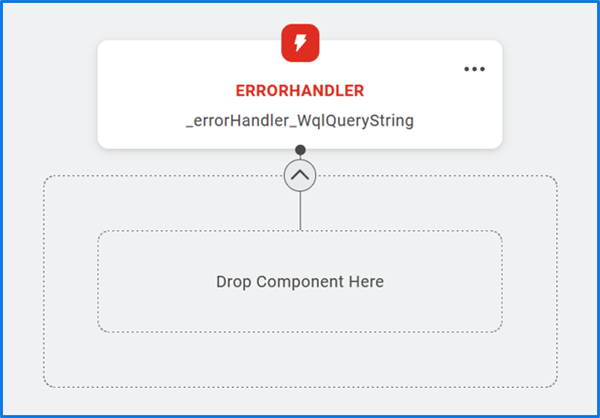
You can use Orchestration Builder to create local error handlers for components and groups of components.
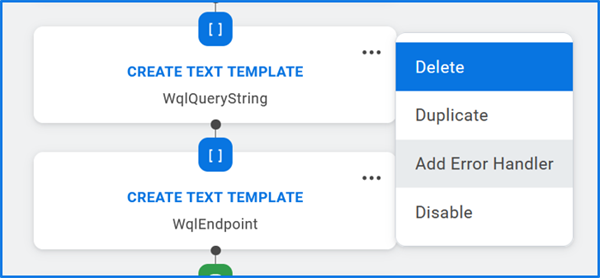
You can also define global error handler actions on what to take action on when an error is not caught locally.
The error handler cannot directly access the exception message of the failing step, but the log component can be used to log the message.
Orchestration Run-time Limitations
Workday orchestrations have these run-time limitations:
Type | Limit | Description |
|---|---|---|
Sync Runtime duration | 5 minutes | Total processing time allowed for a sync orchestration. |
Async Runtime Duration | 20 minutes | Total processing time allowed for an async orchestration. |
Response Message Size | 500 MB | Maximum size of an individual HTTP message response returned from an HTTP API call. |
Launch Message Size | 20 MB | Maximum size of the request message used to launch an orchestration. |
Concurrent Data in Memory | 20 MB | Maximum amount of data an orchestration can have in memory at the same time. |
Concurrent data on disk | 500 MB | Maximum amount of data an orchestration can have on disk in file-backed data structures at the same time |
Synchronous orchestration triggered by a presentation page | 25 seconds | The total processing time allowed for a synchronous orchestration triggered by a presentation page. |
Important
: Always visit the Developer site for the most up to date information on limitations.Orchestration Async Design Pattern
Asynchronous orchestrations can trigger business processes and will wait to complete until the conclusion of the defined event.
Orchestration Join Loop
Use join loops in the Orchestration builder to join two or more data sets or file formats on a key or error handle.
Things to Keep in Mind
Things to keep in mind when building joinLoops:
- Biggest data set should be in the Join On
- Smaller data set should be in the Join with
- Watch memory caps - Join with is stored in memory
Step Groups
Group steps together in Orchestration Builder to form a single entity, making complex orchestrations easier to navigate.
Important
: Orchestration Builder treats a user-defined group of steps as a single logical entity.Only the data that is output by the last step in the group is available for downstream reference.