
Change Visual Preferences
Use Visual Preferences to:
- Revert recent user interface updates to the previous release.
- Enable you to use modeled sheet validation rules on sheets and upon sheet import.
- Improve projected sheet visibility by darkening gridlines and brightening colors.
- Display your company logo in the top navigation bar. If you use Adaptive Planning and other Workday products, you can't upload your logo.
- Enable your team to use avatars for their profiles.
Prerequisites
Security:
General Setup
permission.Opt Out of Recent Interface Updates
Adaptive Planning improves the user interface with nearly every release. You can temporarily opt out of any of the updated features.
The option to opt out applies to only one release. In the next release, the new user interface becomes the default and you can no longer disable it.
To turn off the latest updates temporarily:
- From the nav menu, go toAdministration.
- ClickVisual Preferences.
- Clear theApply latest user interface updatescheck box for these features:
- Sheets, Reports, Dashboards
- Optimize Sheets toggle for Dashboards
- Use the Integration Overview page
- Enable notifications
Enable Modeled Sheet Validation Rules
- From the nav menu, go toAdministration.
- ClickVisual Preferences.
- In theUser Interfacesection, click these check boxes:
- Data validations in Sheets
- Data validations in Import Data (requires Data validations in Sheets)
Enable Interface Updates for Administration Pages
To use the updated interface for administration landing and user pages, you must first enable them.
- From the nav menu, go toAdministration.
- ClickVisual Preferences.
- In theUser Interfacesection, click these check boxes:
- Administration Landing
- Administration Users
Improve Sheet Visibility
- From the nav menu, go toAdministration.
- ClickVisual Preferences.
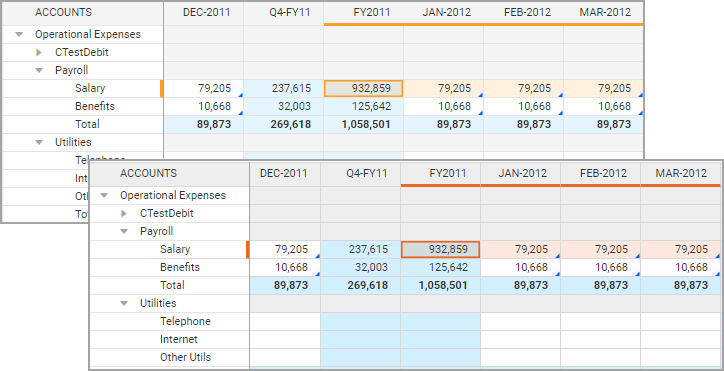
- In theDisplay Settingssection, click theEnhance the visual contrast in sheetscheck box.
Selecting the option darkens gridlines and brightens the colors of sheets for all users of your instance. Sheet details become easier to view on projectors:
Change Company Logo
- From the nav menu, go toAdministration.
- ClickVisual Preferences.
- In theCustomer Logosection, selectImport file.
- ClickChoose File.
- Upload the logo of your company in .JPEG or .PNG file types that are 40MB or less. Your logo displays in the top navigation bar.
Enable Avatars
- From the nav menu, go toAdministration.
- ClickVisual Preferences.
- In theUser Avatarssection, clickAllow avatars.Your team or you can upload images to user profiles. See Change Your Profile, Home Page, and Email Groups.