
Create a Capital Sheet
The Capital sheet template creates a sheet on which users choose an asset class (for example,
Furniture
) from a drop-down list, enter asset cost, and enter units in the time period columns. Based on the asset class selection, the sheet automatically associates each row with the appropriate depreciation timing. You can also assign other identifiers, such as region or project, to each row.This topic walks you through setting up an example Capital sheet. You start with a modeled sheet template for
Capital
and then customize it. There are several tasks required to create and customize the sheet. Refer to the Table of Contents for details.
Prerequisites
Security: Prerequisites
Model
permission.Navigation
 From the
nav menu, select
From the
nav menu, select Modeling
. In the Sheets
menu, select User Assigned
Sheets
or Level Assigned Sheets
to view the list of sheets in your
model.Create a New Capital Sheet
The template for Capital
is populated with columns. You can edit, reorder, or delete these columns. The columns and column types are:
- Asset Class (Text Selector)
- Label (Text)
- Level (Required column)
- Cost (Number)
- Capital Quantity (Timespan)
The template is populated with calculated accounts. You can modify or delete these accounts, but it is best to leave them alone except for the following suggested changes.
The accounts are:
- Value:ROW.cost * ROW.QuantityThis formula is used to calculate the value of the capital purchase.
- Depreciation: Spread of account Value using spread lookupDepr_SpreadThis calculated account holds the result of the depreciation spread of the capital values.
To create a new capital sheet:
- From the sheet list, select theNew Sheetbutton.
- Enter a Sheet name.
- Select theCreate a new sheetradio button, and chooseModeledandCapitalfrom the drop-down.
- Add anAccount code prefix, then selectNext.
A Summary for the sheet appears. You are ready to define your modeled
Capital
sheet.Create an Asset Class
This Capital sheet is designed to have different asset classes (for example, Furniture, Office Equipment, Computers, Leasehold Improvements). Each class can have a different depreciation life. There are two asset classes set up for you already: Furniture & Fixtures
and Leasehold Improvements
. They are already created for you, in the Asset
Classes
column.
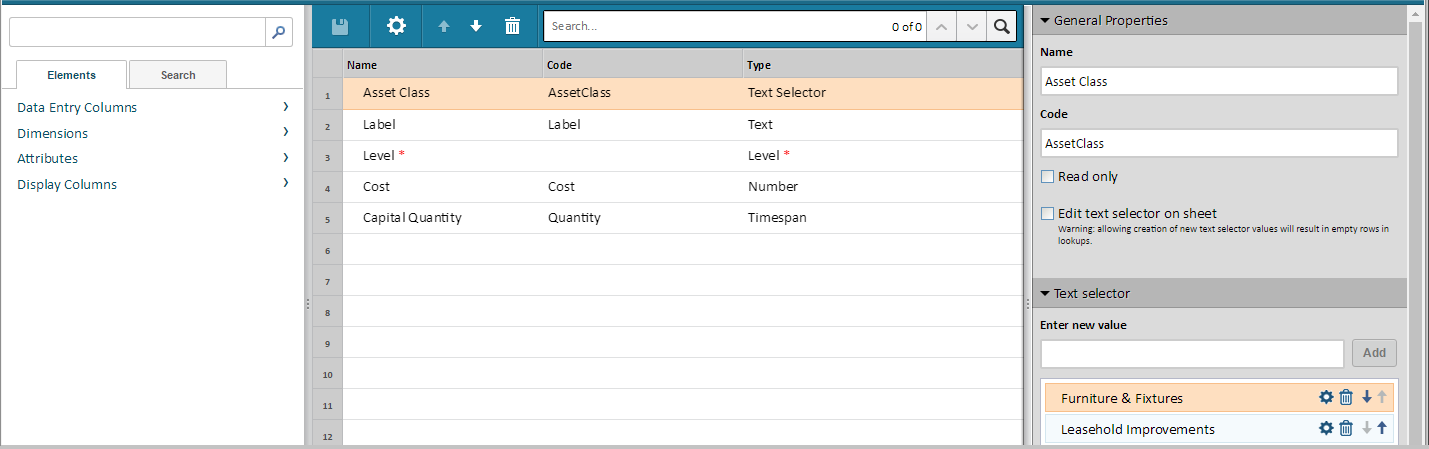
You can rename these asset classes and add others to this
Text Selector
column. This makes the asset classes available in a drop-down menu for users to choose from when they work on a sheet. If the asset classes need to be referenced in formulas outside of this sheet, use a custom dimension column for asset classes instead of a text selector.
To create a new asset class:
- From the Summary, selectColumns and Levelsto view the sheet elements.
- From the center panel, select theAsset Classcolumn (in the center pane).
- In the Text selectorexpander (right pane), type the name of a new asset class in theEnter new valuefield and selectAdd. After you add the new asset class, the next step is to define a depreciation lookup for the asset classes.
You can Edit, Delete, or Reorder text selector values using the icons. The first choice in the list is the default when users add a new row to the
Capital
sheet.Edit a Depreciation Lookup
The depreciation pattern for each asset class is defined in the Depr_Spread
spread lookup. A spread lookup
translates entered text or a selected dimension into values spread over time.
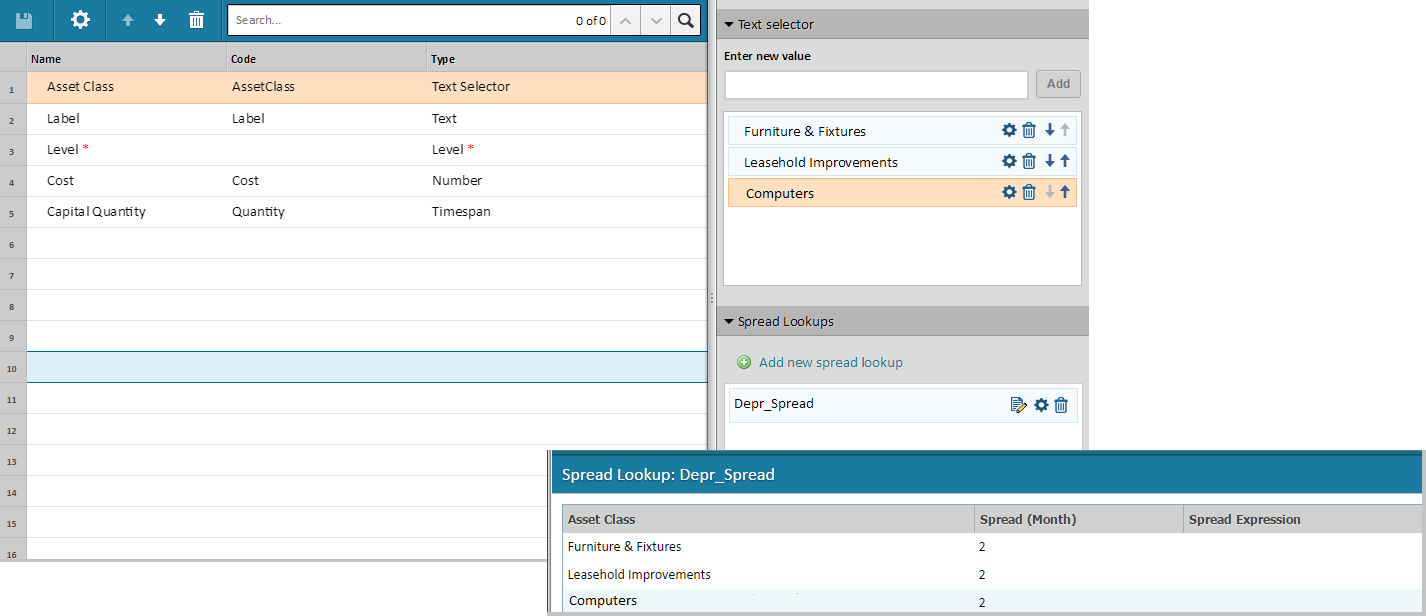
To add depreciation information for asset classes:
- Expand theSpread Lookupsfor the Asset Class column (right pane).
- Click the edit icon next to theDepr_Spreadlookup. You'll see a list of spread lookups for the asset classes.You can also edit Spread Lookups from the Sheet Summary.
- Select an asset class (left pane) and define the Spread (Months) and Spread Expression for the depreciation.
- Spread (Months): The number of months over which the depreciation is spread. For example, if Furniture & Fixtures has a life of three years, enter 36. Entering only a Spread (Months) number and saving automatically creates an even spread expression across the number of months you enter.
- Spread Expression: A range and a fraction like 1:36=1/36. This sets the proportions for each month in the remaining cells for each asset class's row. Spread expressions follow the patternA:B=n/d,D:C=n/dwhereAandCare start month numbers,BandDare end month numbers. The spread proportion isn/dand can be a fraction like 1/40, or a number like .025.Separate each range by the locale specific separator - either comma (,) or semicolon (;) depending on your locale. Only one range is required.Spread Expressiondoes not accept thousands separators in values.
- When you've finished adding the Spread (Months) and Spread Expressionfor the asset class, save.
Set Sheet Properties
- On the Sheet Summary for your Capital sheet, selectColumns and Levels.
- From the toolbar, click the gear button.
- Define sheet Details, Security, and Settings properties as desired. Refer to Set Sheet Properties.
- Select OK to exit Model Sheet Properties.
- ClickSaveto save all changes you made to the sheet.