
Steps: Configure SAML SSO Using Microsoft Entra ID
Configure Microsoft (MS) Entra ID to enable SAML-based SSO between your identity provider and Adaptive Planning. See Concept: SAML SSO. Since the configuration includes steps that you must complete on both applications, keep them open side-by-side on two browser tabs.
Microsoft (MS) Entra ID was previously known as Azure Active Directory (AD).
Set Up MS Entra ID
- From the MS Azure portal, selectMicrosoft Entra ID.
- SelectEnterprise applicationsand thenNew application.
- In the search box, enterAdaptive. From the search results, selectAdaptive Insights. The Adaptive insights Enterprise Application overview page displays.
Configure Microsoft Entra ID Single Sign-On
- Sign in to Adaptive Planning and selectAdministrationfrom the main menu.
- UnderUsers and Permissions, clickSAML SSO Settings.
- Scroll down to theSSO URLsection at the bottom of the page and copy theAdaptive Planning SSO URL. Save this URL for use at a later step.
- In Microsoft Entra ID, from the Adaptive Insights Enterprise Application overview page, clickSingle sign-on.
- SelectSAMLas the single sign-on method. Then, next to Basic SAML Configuration, clickEdit.
- UnderIdentifier (Entity ID), click theAdd identifierlink and paste the Adaptive Planning SSO URL that you copied from Adaptive Planning in an earlier step.
- UnderReply URL (Assertion Consumer Service URL), click theAdd reply URLlink and again paste the Adaptive Planning SSO URL. Then clickSave.
- From theSAML Certificatessection, clickCertificate (Base64)to download and save the certificate to your computer.
- From theSet up Adaptive Insightssection, copy these values for use at a later step:
- Login URL
- Microsoft Entra Identifier
- In Adaptive Planning, on the SAML SSO Settings page, complete these fields:
- InIdentity provider name, enter a name for your configuration.
- InIdentity provider Entity ID, paste the Microsoft Entra Identifier that you copied from MS Entra ID in an earlier step.
- InIdentity provider SSO URL, paste the Login URL that you copied from MS Entra ID in an earlier step.
- Next toIdentity provider certificate, clickChoose Fileand upload the SAML certificate that you downloaded from MS Entra ID in an earlier step.
- Next toSAML user Id, selectUser's Adaptive Planning user name.
- Next toSAML user id location, selectUser id in NameID of Subject. ForSAML NameID format, selectEmail address.
- In theEnable SAMLsection, selectAllow SAML SSO and direct Adaptive Planning login.
- ClickSave.
Create MS Entra ID Test User
- In MS Entra ID, on the left navigation pane, clickUsers.
- On the Users page, clickAll users. Then select .
- Enter the user principal name and email address. Copy the email address for use in a later step.
- Enter the display name for the test user.
- Next toPassword, clickCopy to clipboardfor use in a later step.
- ClickReview + Create.
Create Adaptive Planning Test User
- Sign in to Adaptive Planning as an administrator.
- Navigate toAdministration.
- ClickUsers.
- ClickNew User.
- Enter the name, login, email, and password of a valid MS Entra ID user you want to provision.
- Select a permission set.
- ClickSubmit.
Assign the MS Entra ID Test User
These steps let the MS Entra ID test user that you created access Adaptive Planning using single sign-on.
- In MS Entra ID, on the left navigation pane, clickEnterprise applications.
- In the all applications list, select the Adaptive Insights application that you created.
- On the left navigation pane, clickUsers and groupsand thenAdd user/groupat the top of the page.
- UnderUsers, clickNone Selected. Then from the users list, select the test user.
- ClickAssignon Add Assignment.
Test the SSO (Service Provider Initiated)
Sign in to Adaptive Planning with your username and without a password. You're redirected to the Microsoft SSO sign-in page:
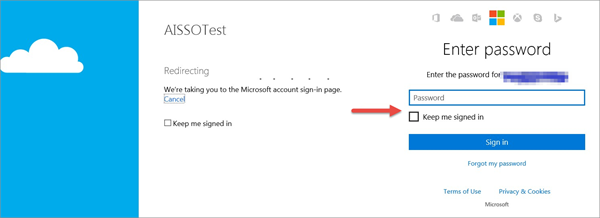
Enter your credentials and complete the SSO sign in. You’re logged in to Adaptive Planning.
Test the SSO (Identity Provider Initiated)
- In MS Entra ID, on the left navigation pane, clickProperties.
- Copy theUser access URL.
- Open a new browser page, paste the User access URL into the URL bar, and pressEnter.
SSO Into Excel Interface for Planning and OfficeConnect
After you've successfully configured and tested SAML SSO with MS Entra ID, users can sign in to OfficeConnect and Excel Interface for Planning with their Adaptive Planning username and leave the Password field blank. On the Microsoft login page, they must enter their MS username and password.