
Steps: Use Named Ranges
Named Ranges
To link a table from
OfficeConnect
for Excel to OfficeConnect
for Word, you need to define the table as a named range.A
named range
is a user-defined area of cells, rows, or columns in an Excel file. With a named range, you can perform operations on that area as a whole. One powerful use is the ability to jump quickly to the named range from wherever else you are in the workbook. Another use, which you'll work with in this section, is that you can select and insert a named range from OfficeConnect
for Excel into your OfficeConnect
for Word document to create links between the two.You can move or change data, and even add or delete rows or columns within the named range, and the named range maintains its integrity as a single object. When you make any change to the named range in Excel, the change is reflected in PowerPoint as soon as you refresh the presentation.
When you use
OfficeConnect
with Microsoft Word, you are creating a conduit of easily updatable data originating in your instance, being formatted in your OfficeConnect
for Excel workbook, and ending with linked data in an OfficeConnect
for Word document.The process for linking a table or other data from
OfficeConnect
for Excel to OfficeConnect
for Word always starts with defining a named range of one or more Excel cells that includes the data you want to link. These named ranges make it possible to link information between the two applications. In fact, you can't even connect the two files unless the Excel file has at least one named range.Search for Named Ranges in Excel online help for more information.
Create a Named Range
Use one of two methods to create a named range:
- Select an area on the grid
- Use the Define Name command
To create a named range by selecting an area:
- Select the area you want to include in the range such as set of cells, rows, or columns.
- Click in theName Boxmenu so that the current contents are selected.
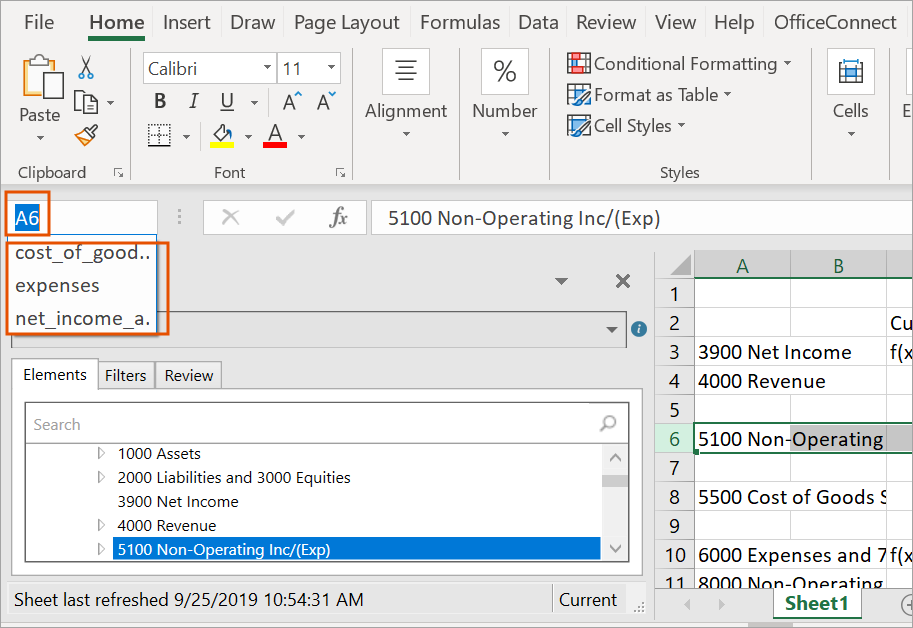
- Enter the name you want for this named range, and then press Enter. The named range is created. To see the named ranges in any sheet in this workbook, you can click the Name Box menu. Select a named range in the menu to goes to its location in the grid.
You can also create a named range by using the Define Name command.
To create a named range by using the Define Name command:
- Select the area you want to include in the named range such as set of cells, rows, or columns.
- Select theFormulastab in the ribbon.
- From theDefined Namesgroup, selectDefine Name.
- Enter the name you want for this named range.
- InScope, specify whether this named range is available from a particular worksheet in the workbook, or to the whole workbook.
- InComment, add a note if necessary.
- InRefers to, verify the code reflects the area you selected for this range. Make any corrections as needed, either by selecting in the grid or by changing the code.
- ClickOK. The named range is created as you specified. You can see the named range in theName Boxmenu.
Change a Named Range
You can change a named range to add or remove columns or rows. The named range adjusts automatically.
Use the Name Manager to:
- Change the scope of a name range.
- Change the name of the named range.
- Delete a named range.
To change or delete a named range:
- Select theFormulastab in the ribbon.
- From theDefined Namesgroup, selectName Manager. The Name Manager dialog appears, listing all named ranges in the workbook.
- Select the named range you want to change, and then clickEdit.To delete a named range, clickDelete.
- Change the name of the named range.
- InComment, add or change a note about the named range.
- InRefers to, change the area for this named range. When you click in the field, the range appears in the grid. Make your changes by either selecting in the grid or by changing the code.
- ClickOK.
- ClickClosein the Name Manager dialog box. The named range is modified as you specified.