
Reorganize Account Structure
Audience: Administrators who manage the model.
To reorganize the account list:
- Reorder: Change the order of how accounts display.
- Re-parent: Change the rollup hierarchy of accounts and how the data rolls up.
In the following example, you can
reorder
Fixed Assets, Current Assets, Other Assets and Long Term Assets. If you moved Long Term Assets to make it a child of Fixed Assets, you would be changing its rollup, or re-parenting
it.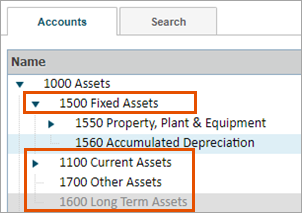
You cannot reorder or re-parent root accounts or some general ledger accounts. You can also import a new structure using the template. See Import and Export Accounts and Reference: Built-In General Ledger Accounts.
Prerequisites
Prerequisites
When you re-parent accounts, the rollup data changes for all versions, including locked and archived versions. For locked version, this affects any calculations that reference the rollups. For archived versions, the calculations have been stored and won't be affected.
- Understand how account hierarchies work. See Concept: Accounts.
- Required permission: Model Management > Model
- Additional permissions based on task: Model Management > Assumptions and Model Management > Import Structure.
Get to GL, Custom, Metric, and Assumption Accounts
 From the nav menu, select
Modeling
. From the Accounts
menu, select:- General Ledger Accounts
- Custom Accounts
- Metric Accounts
- Assumptions
Get to Modeled and Cube Accounts
From the nav menu, click
Modeling
. From the Sheets
menu, click either Level-Assigned
Sheets
or User-Assigned Sheets
. Click the Edit
link next to
the cube or modeled sheet. Select the Cube Accounts
link or the Modeled
Accounts
link. Reorder Account List
When you reorder accounts, you can only move accounts within the same level of the hierarchy.
- Up and Down Arrows: Highlight the account and click the up and down buttons to move the account.
- Cut and Paste: Select the account and right-click >Cut. Then, select another child account account in the same list, and right-click >Paste.
- Drag and Drop: Select the account. After you see the Account Details, select and hold as you drag the account to another location. Drop the account in its new spot.
Re-parent Accounts
When you re-parent accounts, you move accounts so that they rollup to a different account.
If an account's
Rolls
up to
field is read-only, it can't be re-parented (see Reference: Built-In General Ledger Accounts):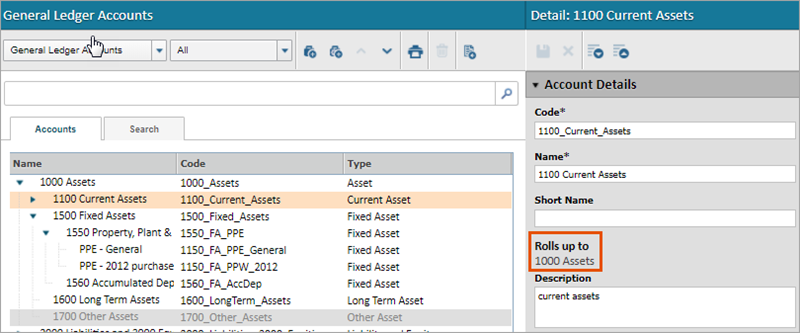
Options to Re-parent
Consider the state of the intended rollup before choosing your re-parenting method.
Has existing child accounts. |
|
| Create a temporary child account so that the intended rollup appears in the Rolls up to drop-down. |
|
|
Cut and Paste
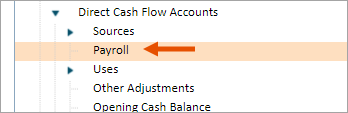
- Account to re-parent: Payroll.
- Intended Rollup: Direct Cash Flows.
- Note: Direct Cash Flow has child accounts.
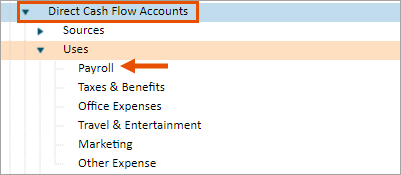
- Select an account in the list.
- Right-click and selectCut.
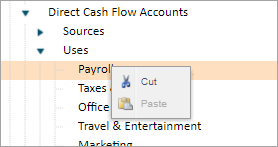
- Select a child account of the intended rollup. In the example, we select Sources.
- Right-click and selectPaste.
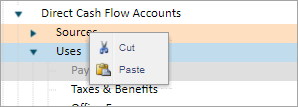
- You get a warning message. Select theMove accountcheck boxand selectSave.
The account moves right below the highlighted account.
Drag and Drop
- Account to re-parent: Payroll.
- Intended new rollup account: Sources.
- Note: Sources has child accounts.
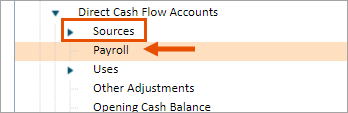
- Expand the intended rollup account.
- Select the account you're re-parenting.
- After you see the Account Details, select and hold as you drag the account.
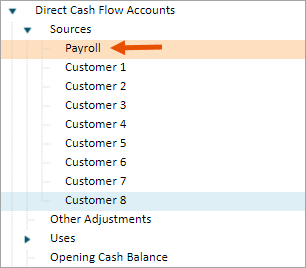
- Release to drop the account in its new spot, above or below an existing child.
- In the warning message, select theMove accountcheck boxand selectSave.
The account moves where you dropped it.
Edit Account Settings
- Account to re-parent: Payroll.
- Intended new rollup account: Uses.
- Note: Uses has child accounts.
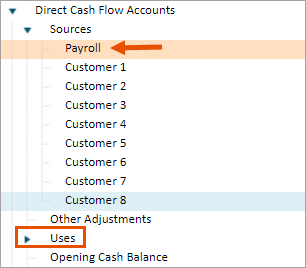
- Select the account to re-parent.
- In the Account Detail panel, select the new rollup account or group from theRolls up todrop-down.
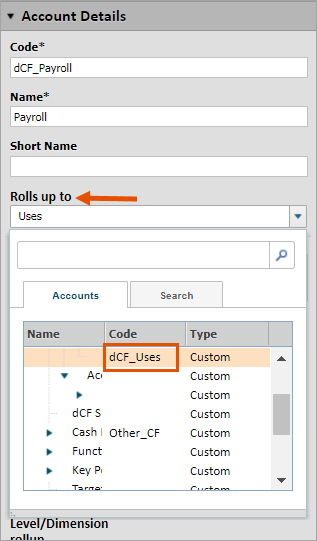
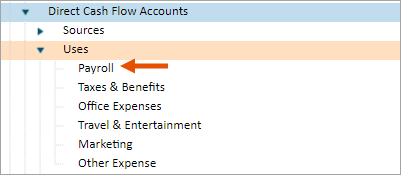
The account moves under the rollup account you selected.
Create Temporary Child Account
Create a temporary child account for the intended rollup account. Then, the intended rollup appears in the Rolls up to
drop-down.
- Account to re-parent: Adjustments due to Exchange Rates.
- Intended new rollup account: Other Adjustments.
- Note: Other Adjustments has no child accounts, so it doesn't appear in theRolls up todrop-down. Because the account also has no data, a temporary child will not delete any data.
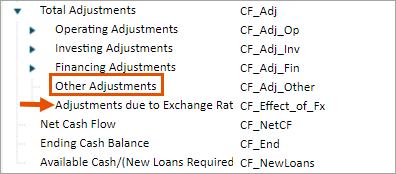
- Add a temporary child account: Select the intended rollup account and selectCreate New Accountto create the temporary child account. Save it.
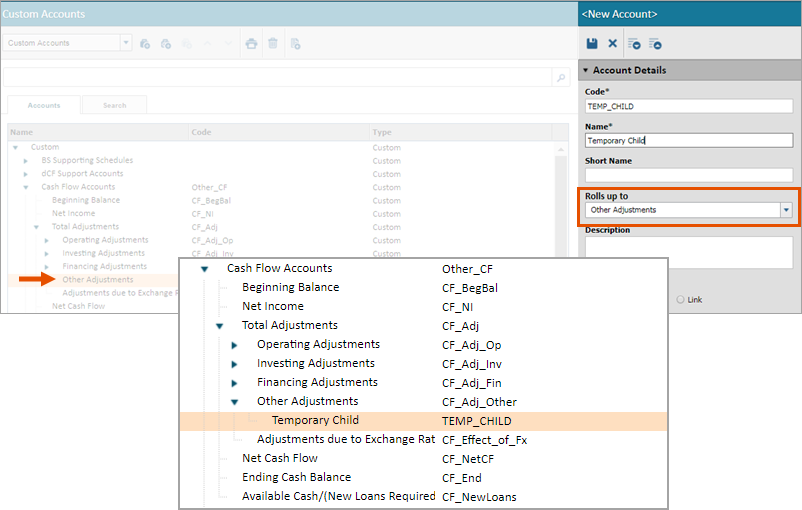
- Change the rollup account: Select the account you want to re-parent. Now that Other Adjustments has a child account, you can select it from theRolls up todrop-down. Choose the intended rollup account and save.
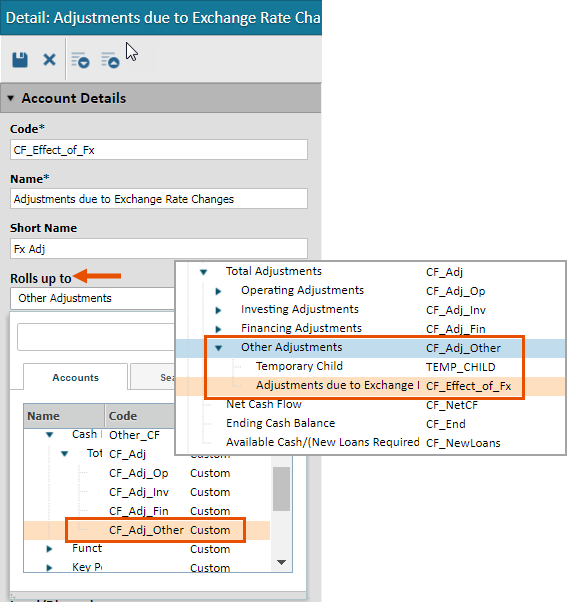
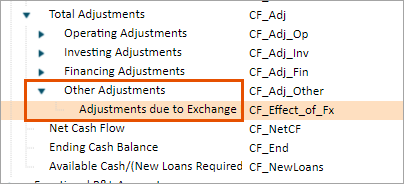
- Delete the temporary child account: Highlight the temporary child account you created and clickDeletefrom the toolbar.
The rollup account now shows the data of the account you re-parented.
Create Another Child Account
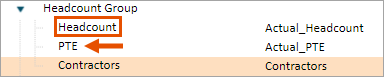
- Account to re-parent: PTE (Part Time Employee).
- Intended Rollup: Headcount.
- Note: Headcount has historical and current data. Headcount has no child accounts. If you create a child account, the data from Headcount rolls down to the child account. This method let's you move the data without losing it.
- Add a child account to the intended rollup account: Select the rollup account and clickCreate New Accountfrom the toolbar to create the new child account. Save it. The data from the intended rollup moves to this account.
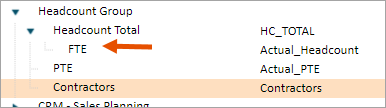
- Change the rollup account: Select the account you want to re-parent and choose the intended rollup account from theRolls Up todrop-down.Save.
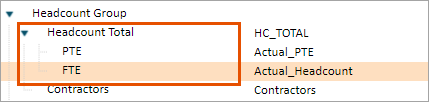
The intended rollup account holds the total of the new child account and the account you re-parented.
Make the Intended Rollup a Child Account
- Account to re-parent: PTE (Part Time Employee).
- Intended Rollup: Headcount.
- Note: Headcount has data and no child accounts. This method keeps the data in the original account.
- Add a new rollup account: Select the rollup account of the intended rollup.
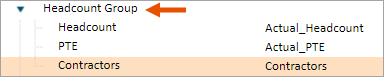
- ClickCreate New Account, enter the details, and save the account. This account is the new rollup account for the intended rollup and the account you wanted to re-parent. Optional: Rename it to indicate that it is now a total. Note: The new rollup has no data at this point.
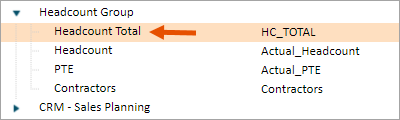
- Add a temporary child account: Select the new rollup account and selectCreate New Accountto create the temporary child account. Save it.
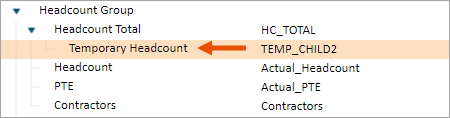
- Re-parent the original account: Cut and paste or drag and drop the account you wanted to re-parent right above the temporary child account. Optional: Rename it to clarify the purpose. The rollup now holds the totals. The original account still holds the data.
- Re-parent the intended rollup account: Cut and paste, or drag and drop the intended rollup to make it a child of the new rollup. The rollup now totals both child accounts. The child accounts still hold the data.
- Delete the temporary account: Select the temporary child account and clickDelete.
The new rollup account contains the total of the intended rollup and the account you re-parented, effectively combining the totals. In the example, Headcount was renamed to FTE to differentiate it from Headcount Total.